Claire: Shooting for perfection
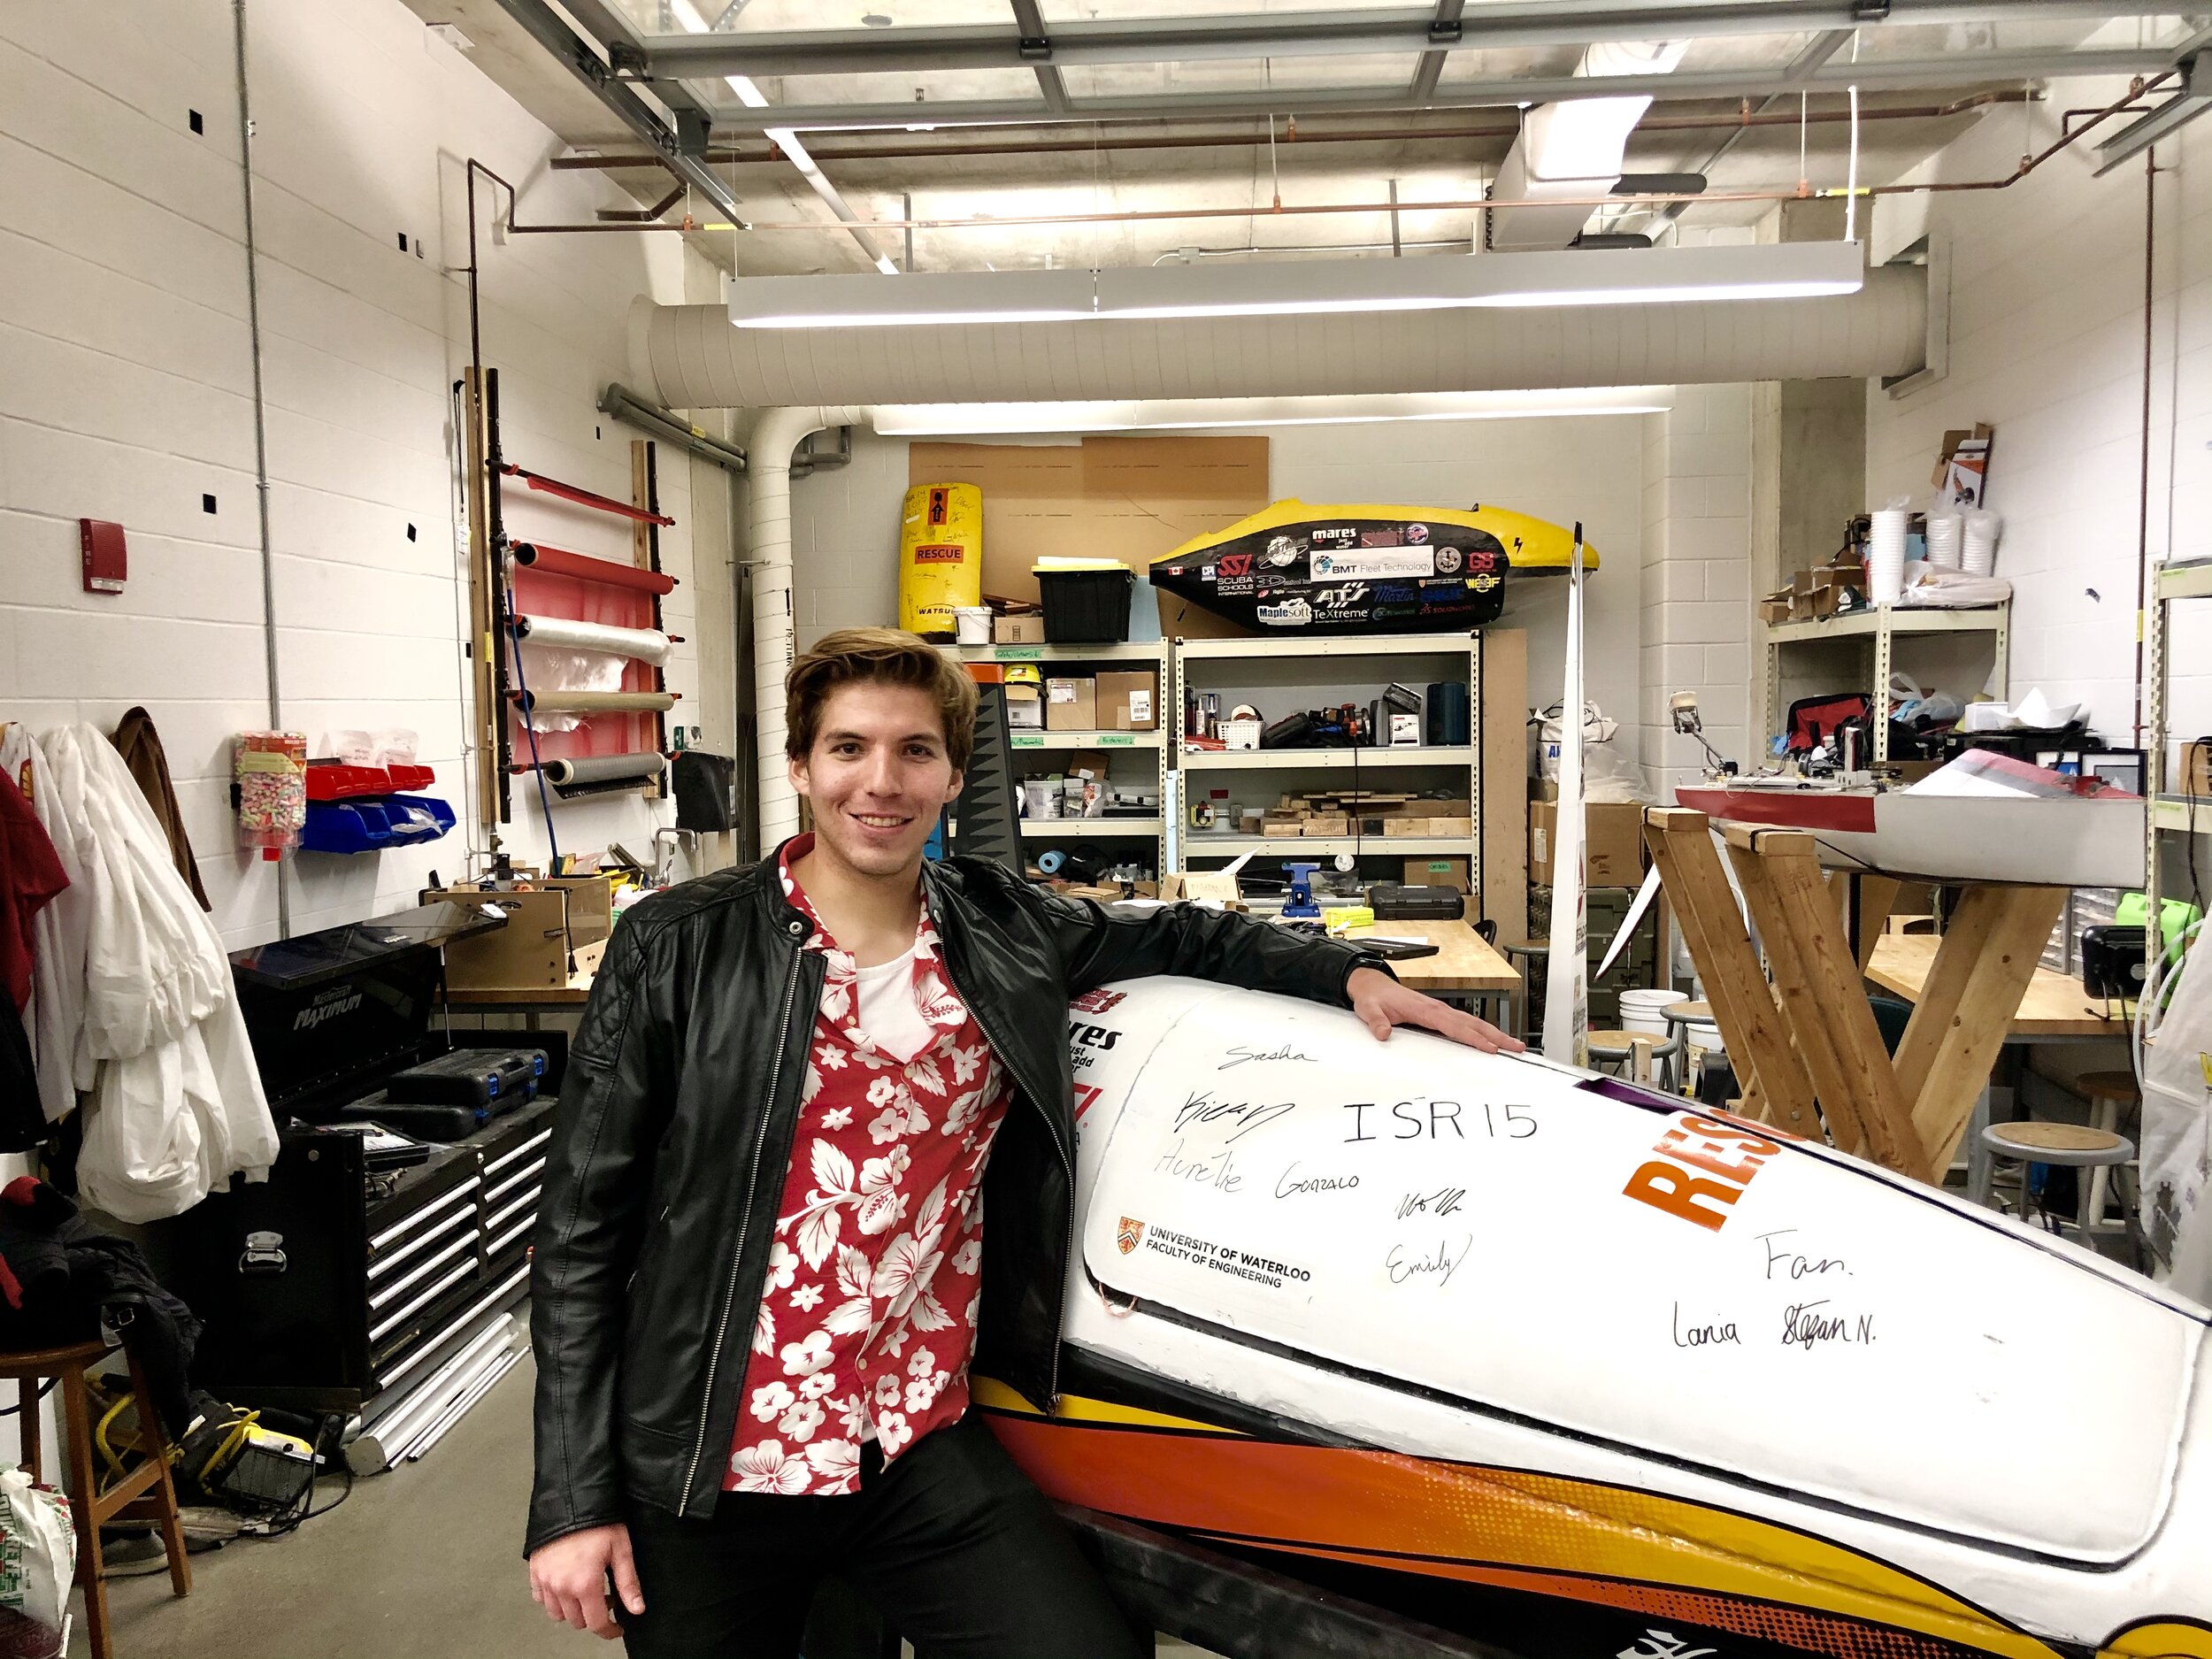
After 4 years of building submarines, my undergrad was coming to an end. Claire, our 3rd generation submarine, would be my last chance to improve the engineering and craftsmanship behind our submarines before passing it the post onto the next generation of submariners. This also marked an important milestone for the team: a change in leadership. Most teams struggle with these transitions: as the most experienced members leave, team performance usually suffers. Plus it was also a personal priority for me to ensure the team would continue to operate and be successful after I left, else my efforts in founding it and sustaining it for years would go to waste.
Once again, to put the Claire project into context, we had come back from racing in Maryland with lower than desirable results. The team attributed the poor performance to a diminished budget and an extremely tight timeline, both of which led to cutting too many corners. For this reason, we skipped the next race in Europe (effectively doubling the design cycle of Claire to two years) and focused heavily on securing additional sponsors.
For Claire I focused exclusively on the design and fabrication of the hull, as this was by now my expertise. My responsibilities in other areas of the team shifted to a support role as the new team leadership took charge, which I must said they did incredibly well.
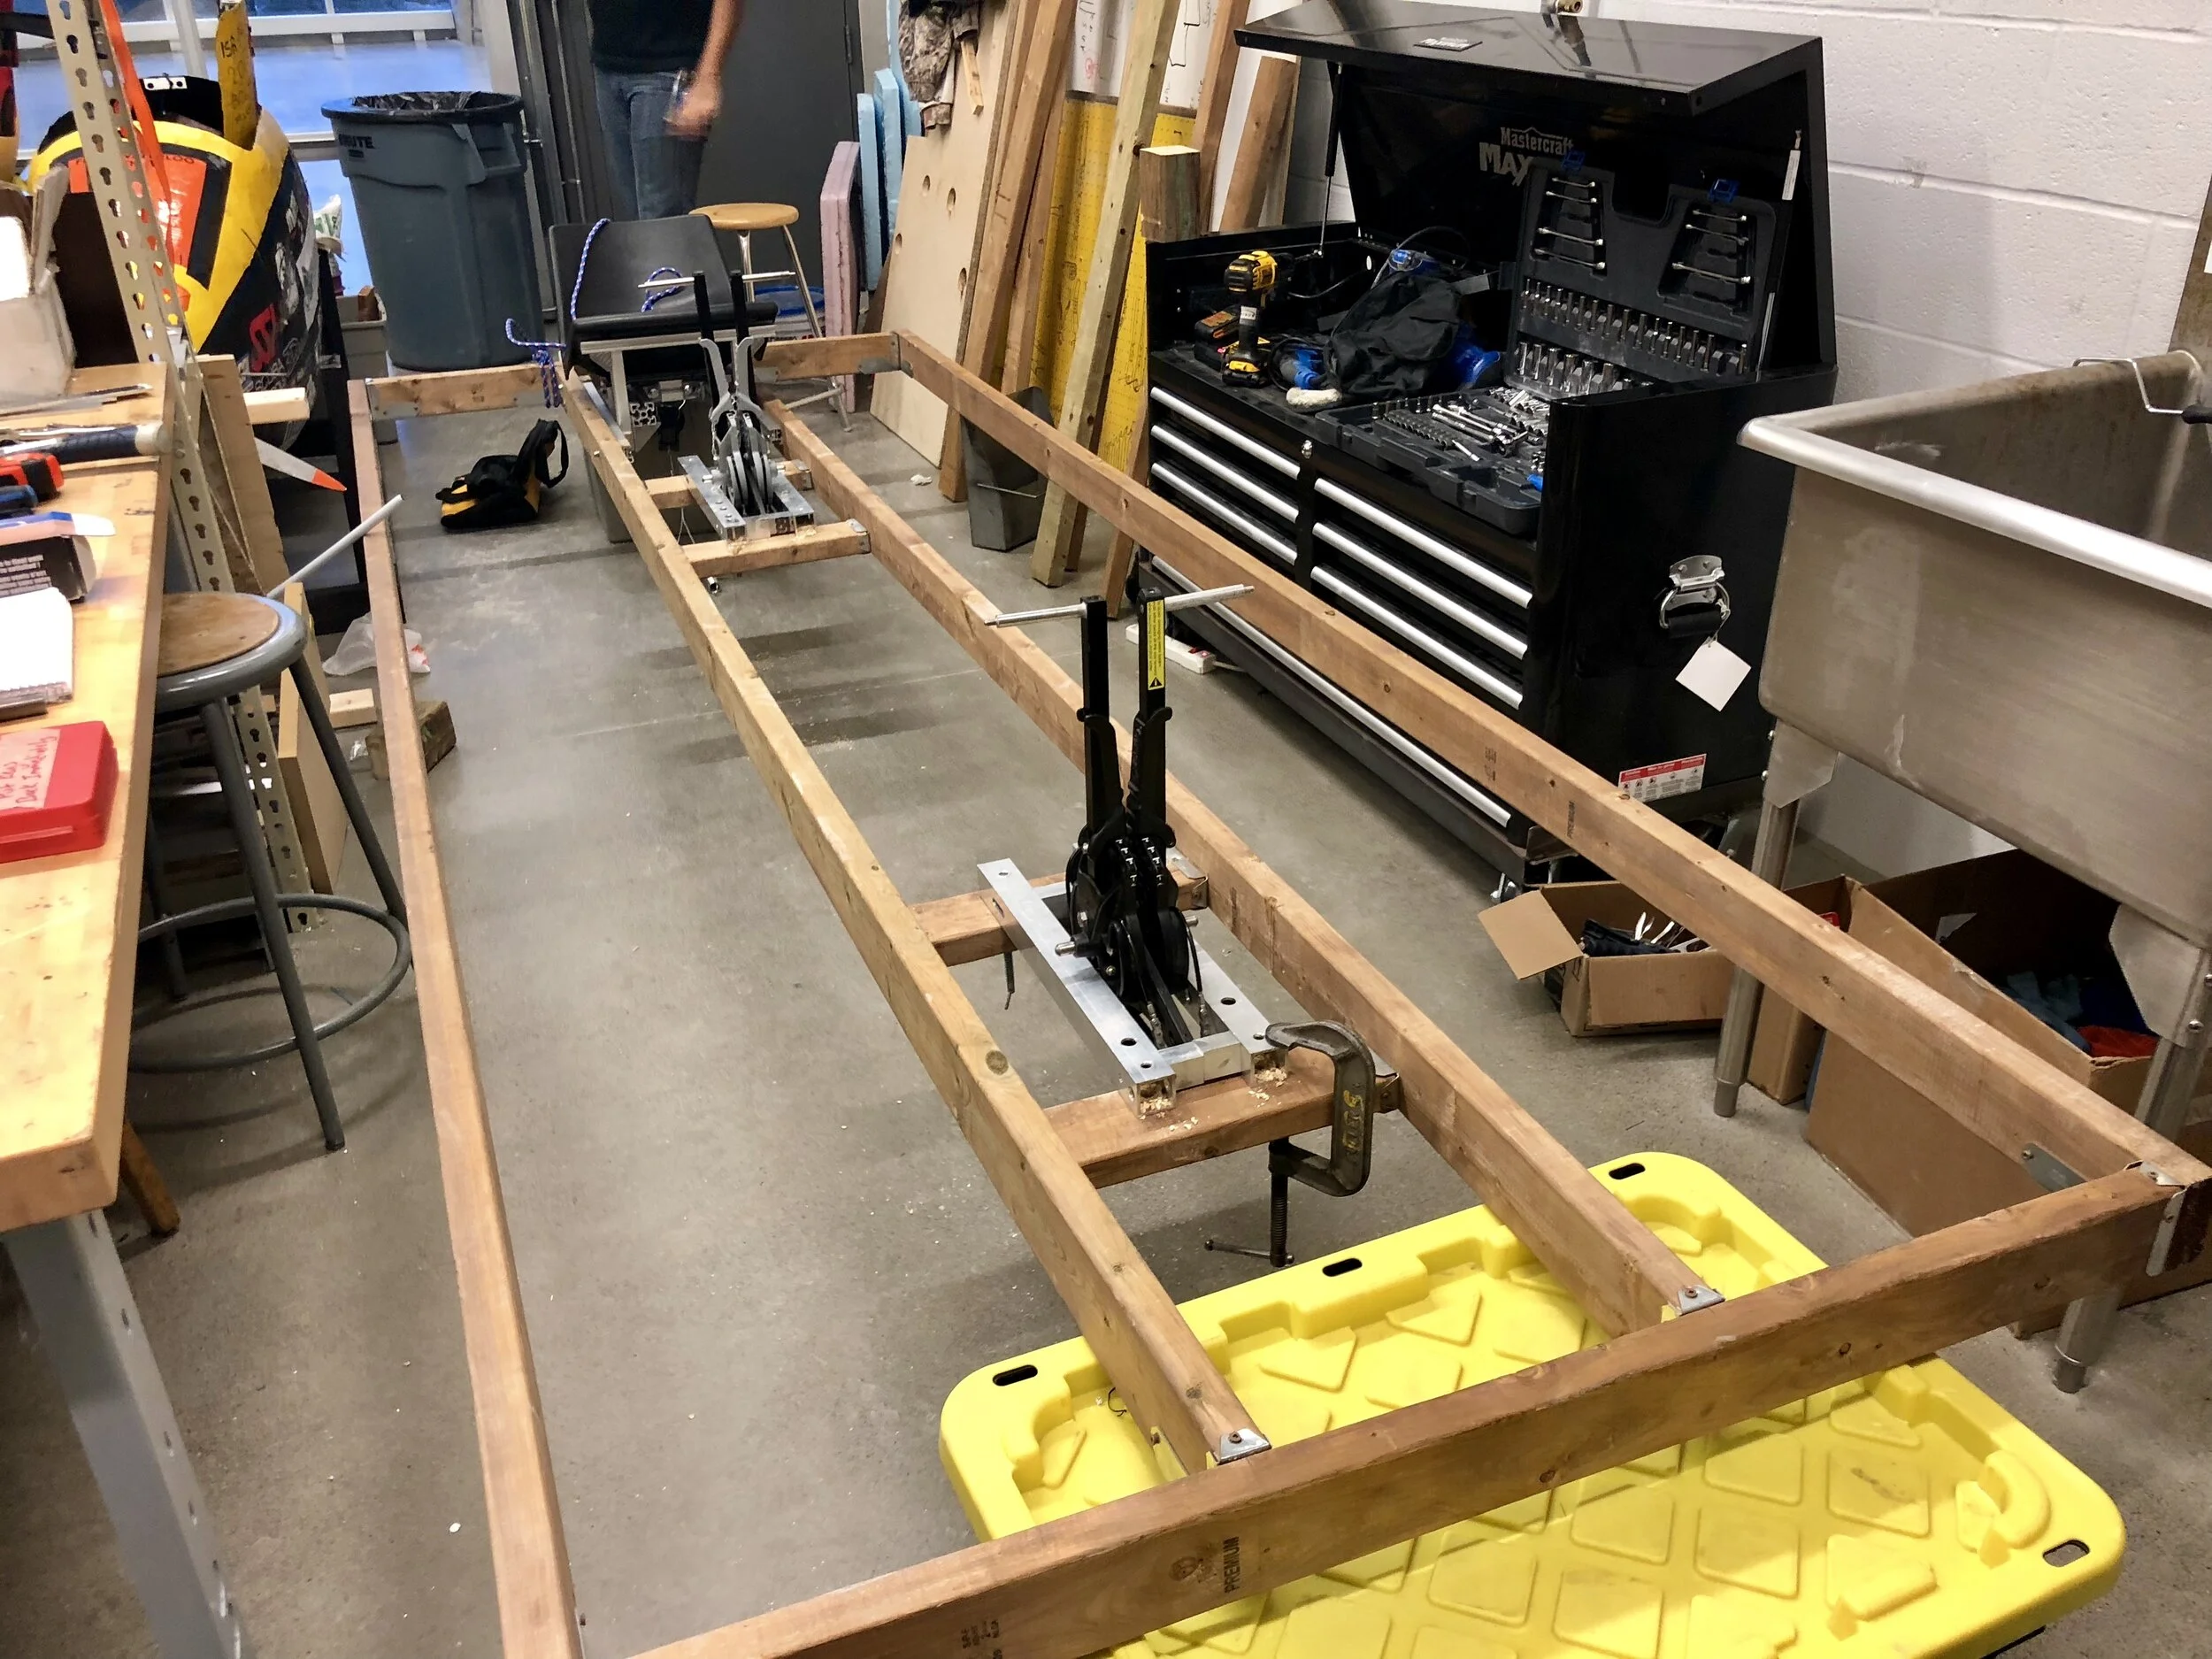
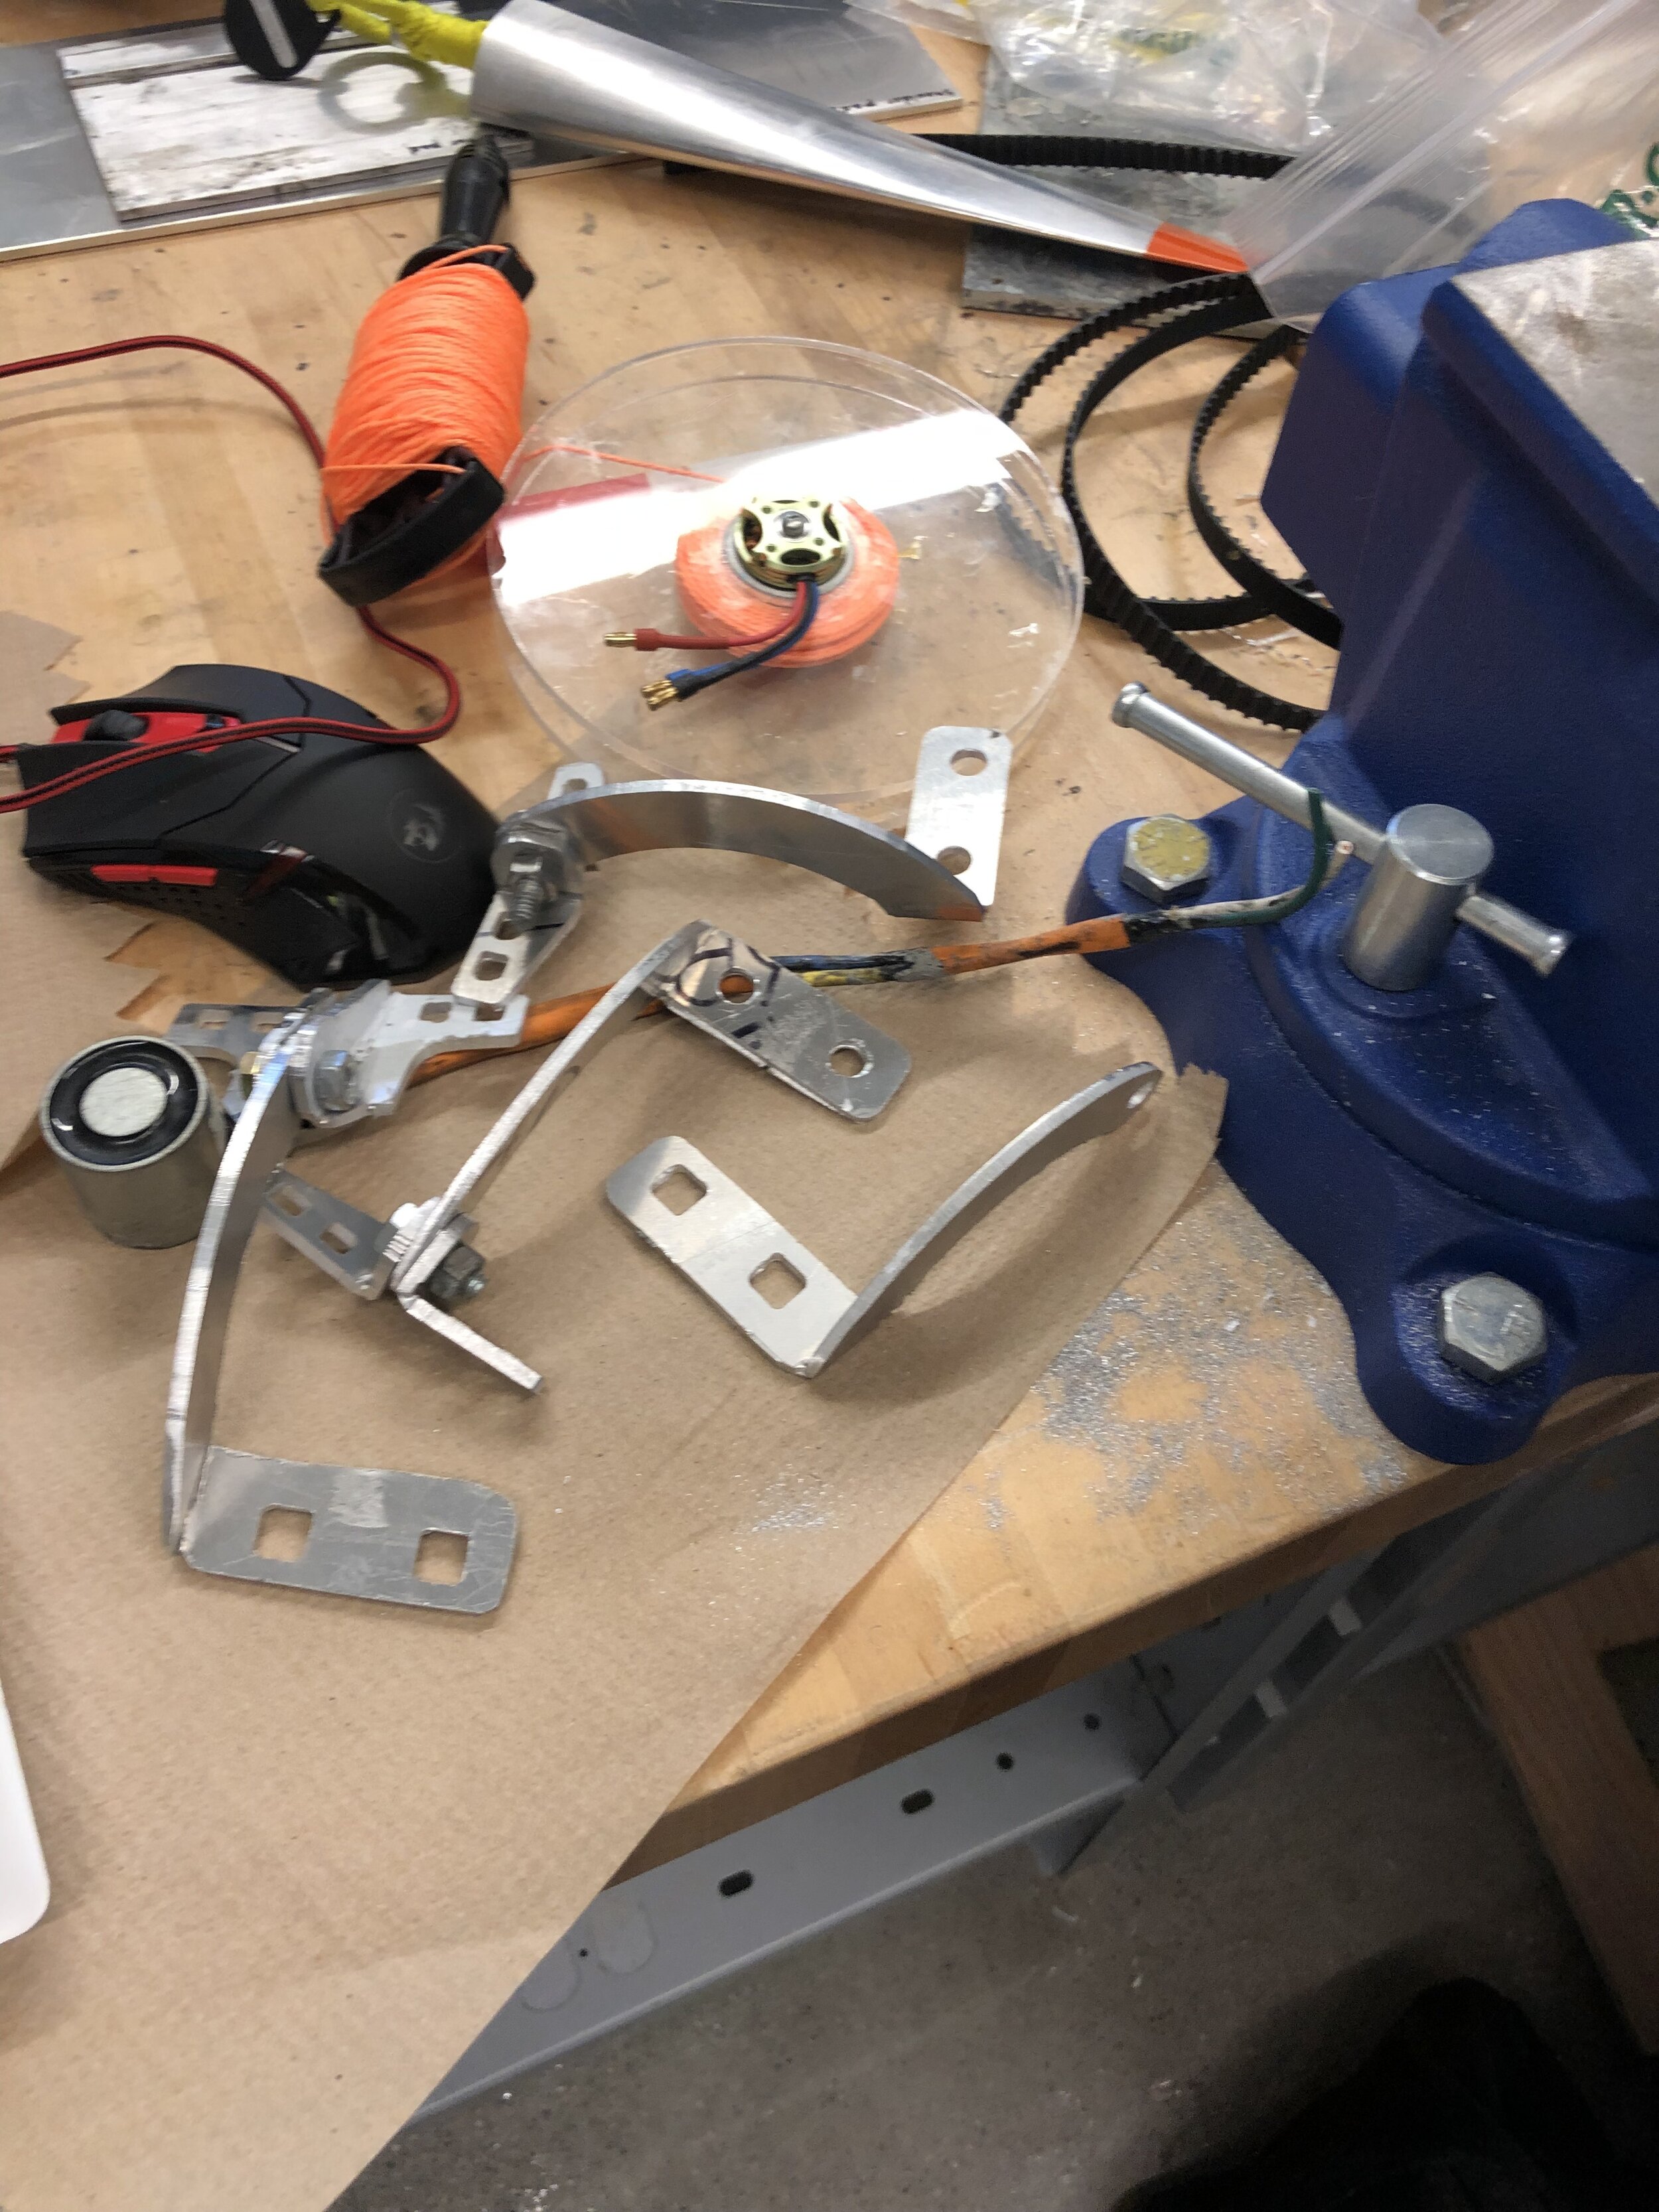
Propulsion test jig.

Hobie pedal system on a kayak, its natural habitat.
Competition categories are broken down into one person versus two person, and also propeller versus non-propeller. Our two previous submarines had been single person and propeller driven and we were looking to venture outside of it. Designing propellers is not only incredibly difficult and expensive (perhaps this is what led to our underperformance in terms of acceleration), but also the trend at competition for the past few years had been for non-propeller submarines to win in maximum speeds. And since the next race we would attend was a straight line drag race, we were designing for speed.
The team looked into the Hobie drive system, which is a pedal based system used in kayaks as an alternative to row paddles. We signed Hobie as a sponsor and built a jig which we could use to measure the thrust as a function of power input at the pool. Ultimately the goal was to integrate two of these Hobie systems into a single set of pedals to maximize thrust and eliminate any thrust vector moments.

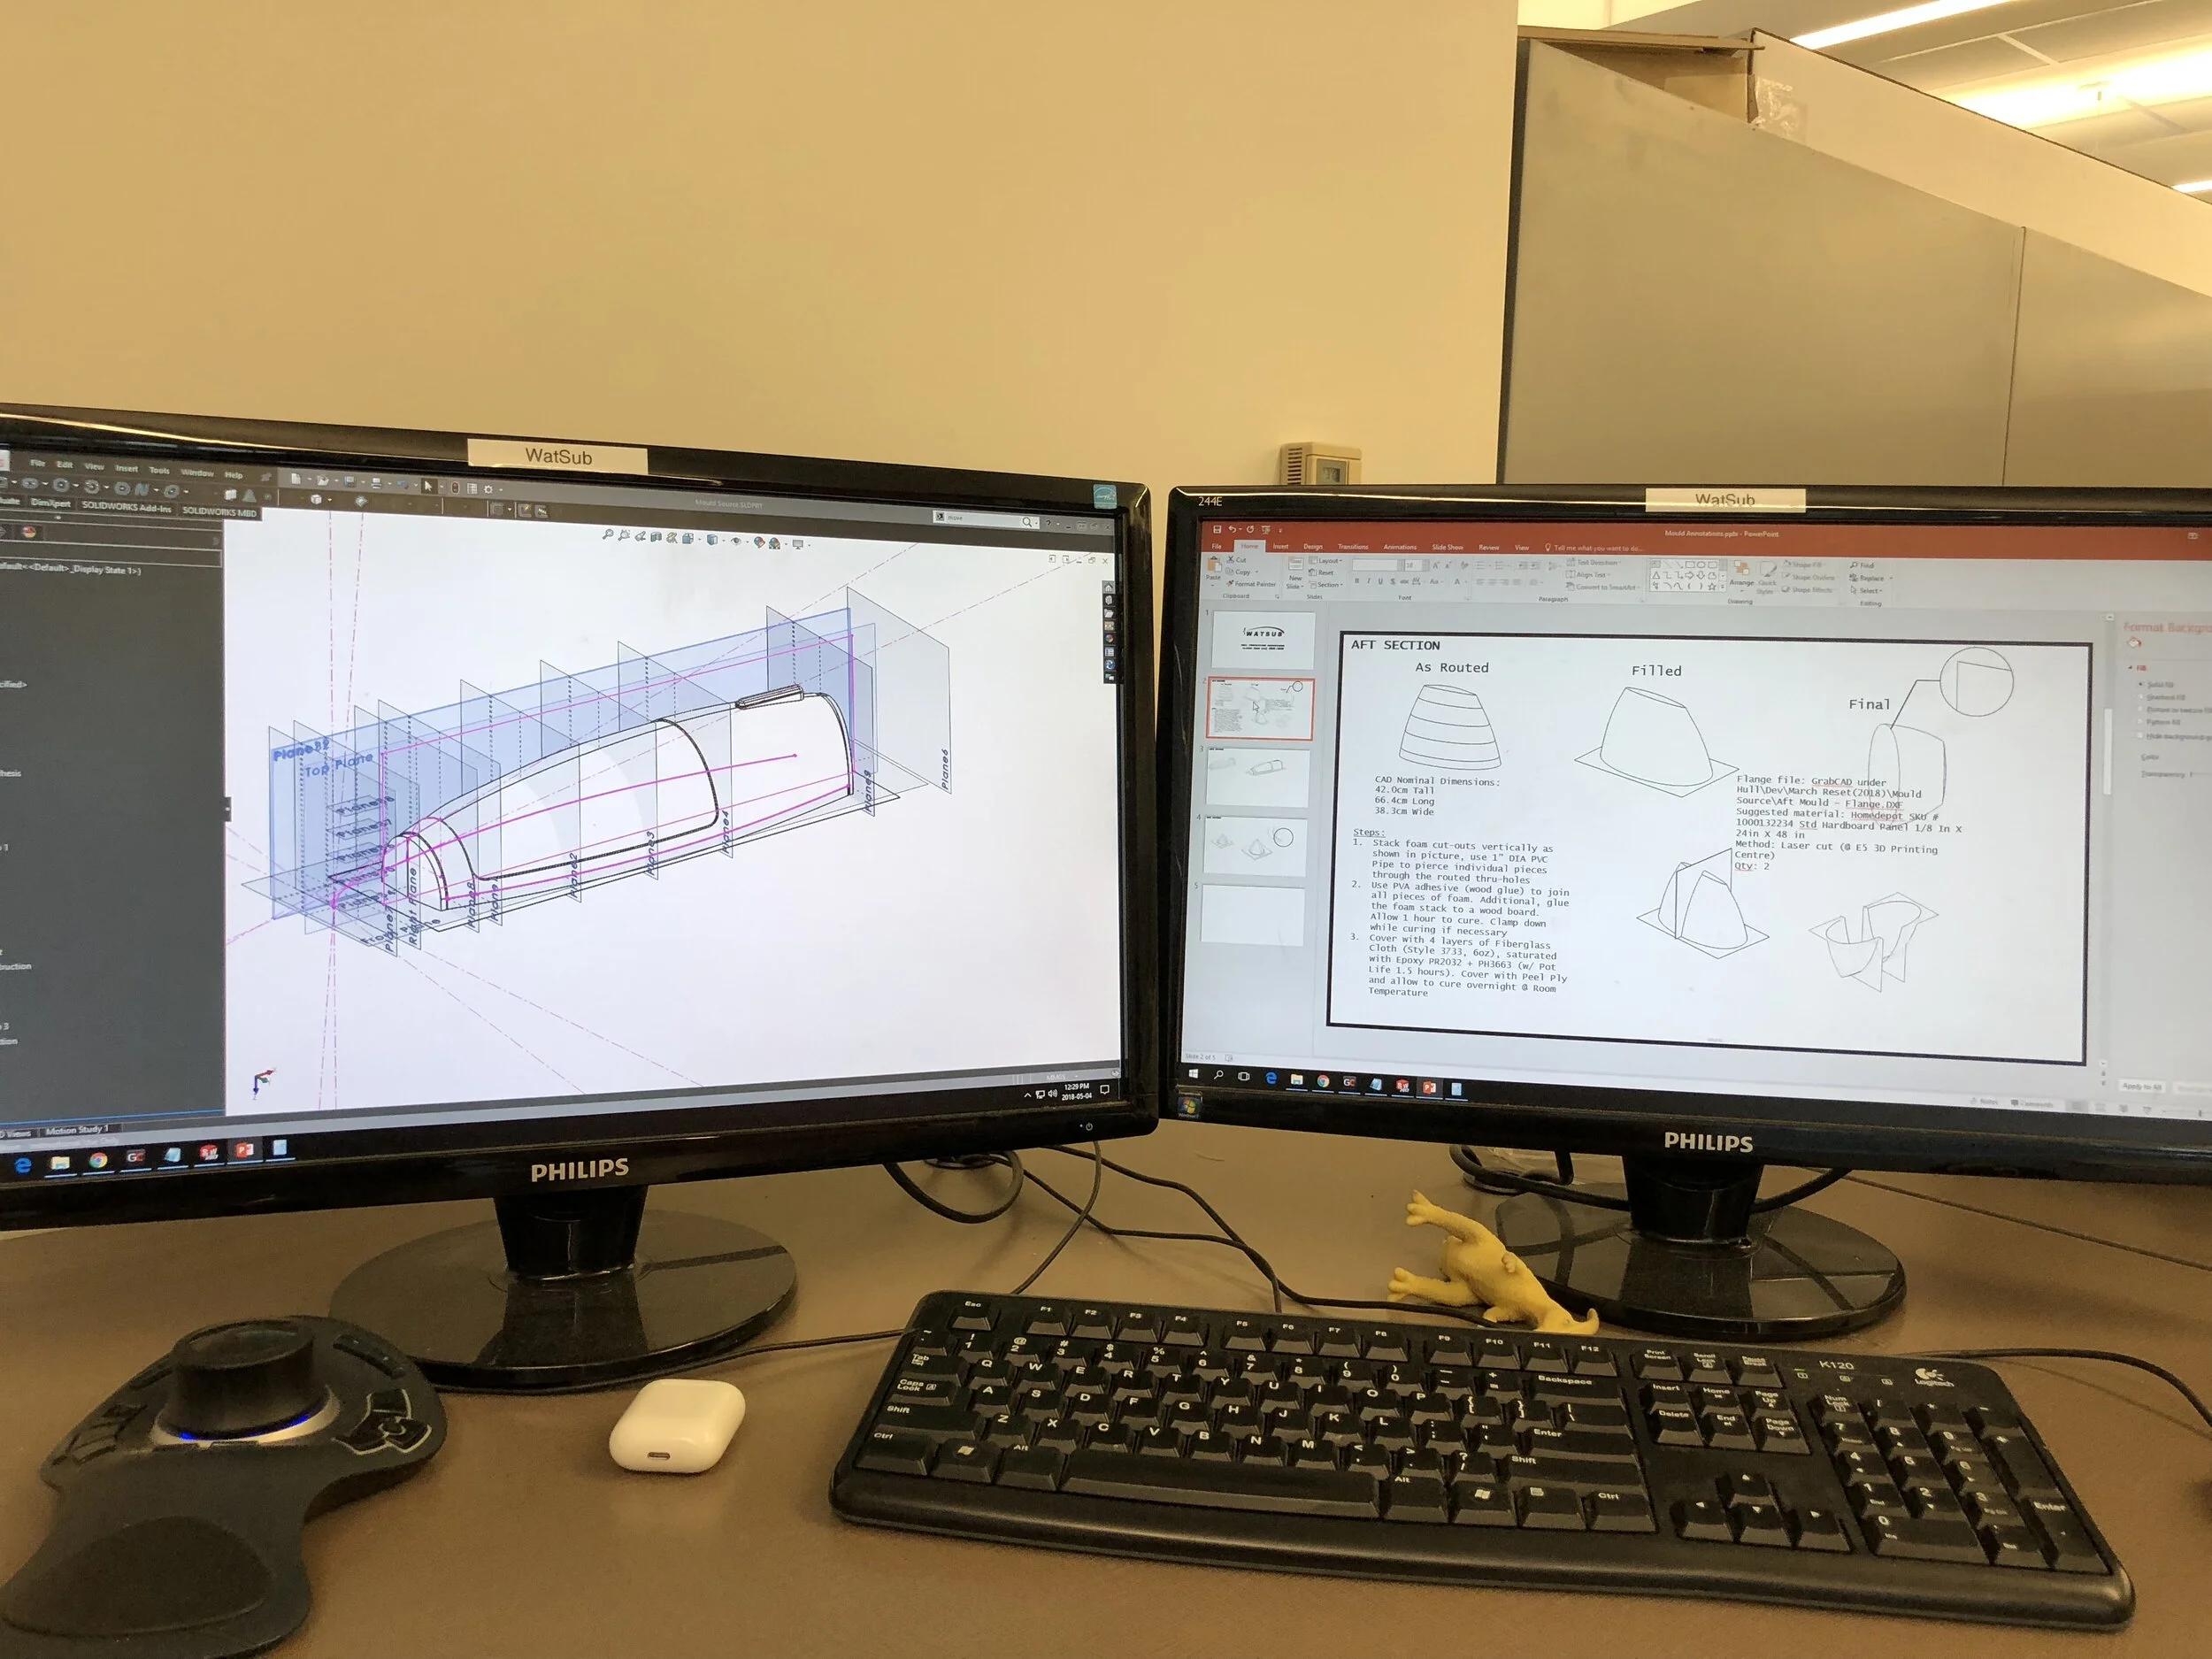
Extract of a hull design presentation.

Extract of a hull design presentation
The team also signed BMT (the defence company that builds actual submarines for the navy) as a sponsor, this did not only mean a big cheque but also access to engineering resources. And so for the first time ever we spent a significant portion of time optimizing the hull shape not only for the ergonomic packaging of the pilot and subcomponents, but also hydrodynamically. I designed 6 release candidate exterior surface models, and used our previous 2 submarines as benchmark. This was feed into an ANSYS CFX CFD model (ANSYS was another of our new sponsors that year). We also studied the hydrodynamic effects of steering, including yaw and pitch and the moments produced at 3 degrees and 5 degrees steering angels to guide the design of the controls system.
The results were used on a MatLab Simulink model I created of the race track, including the expected pilot power output curve, and acceleration and deceleration zones on the track. As mentioned in the Bolt post, we optimized not only for drag coefficient and wet surface area, but also the interior volume of the hull which directly correlates to wet mass onboard.
Plug 3D CAD and manufacturing guide.
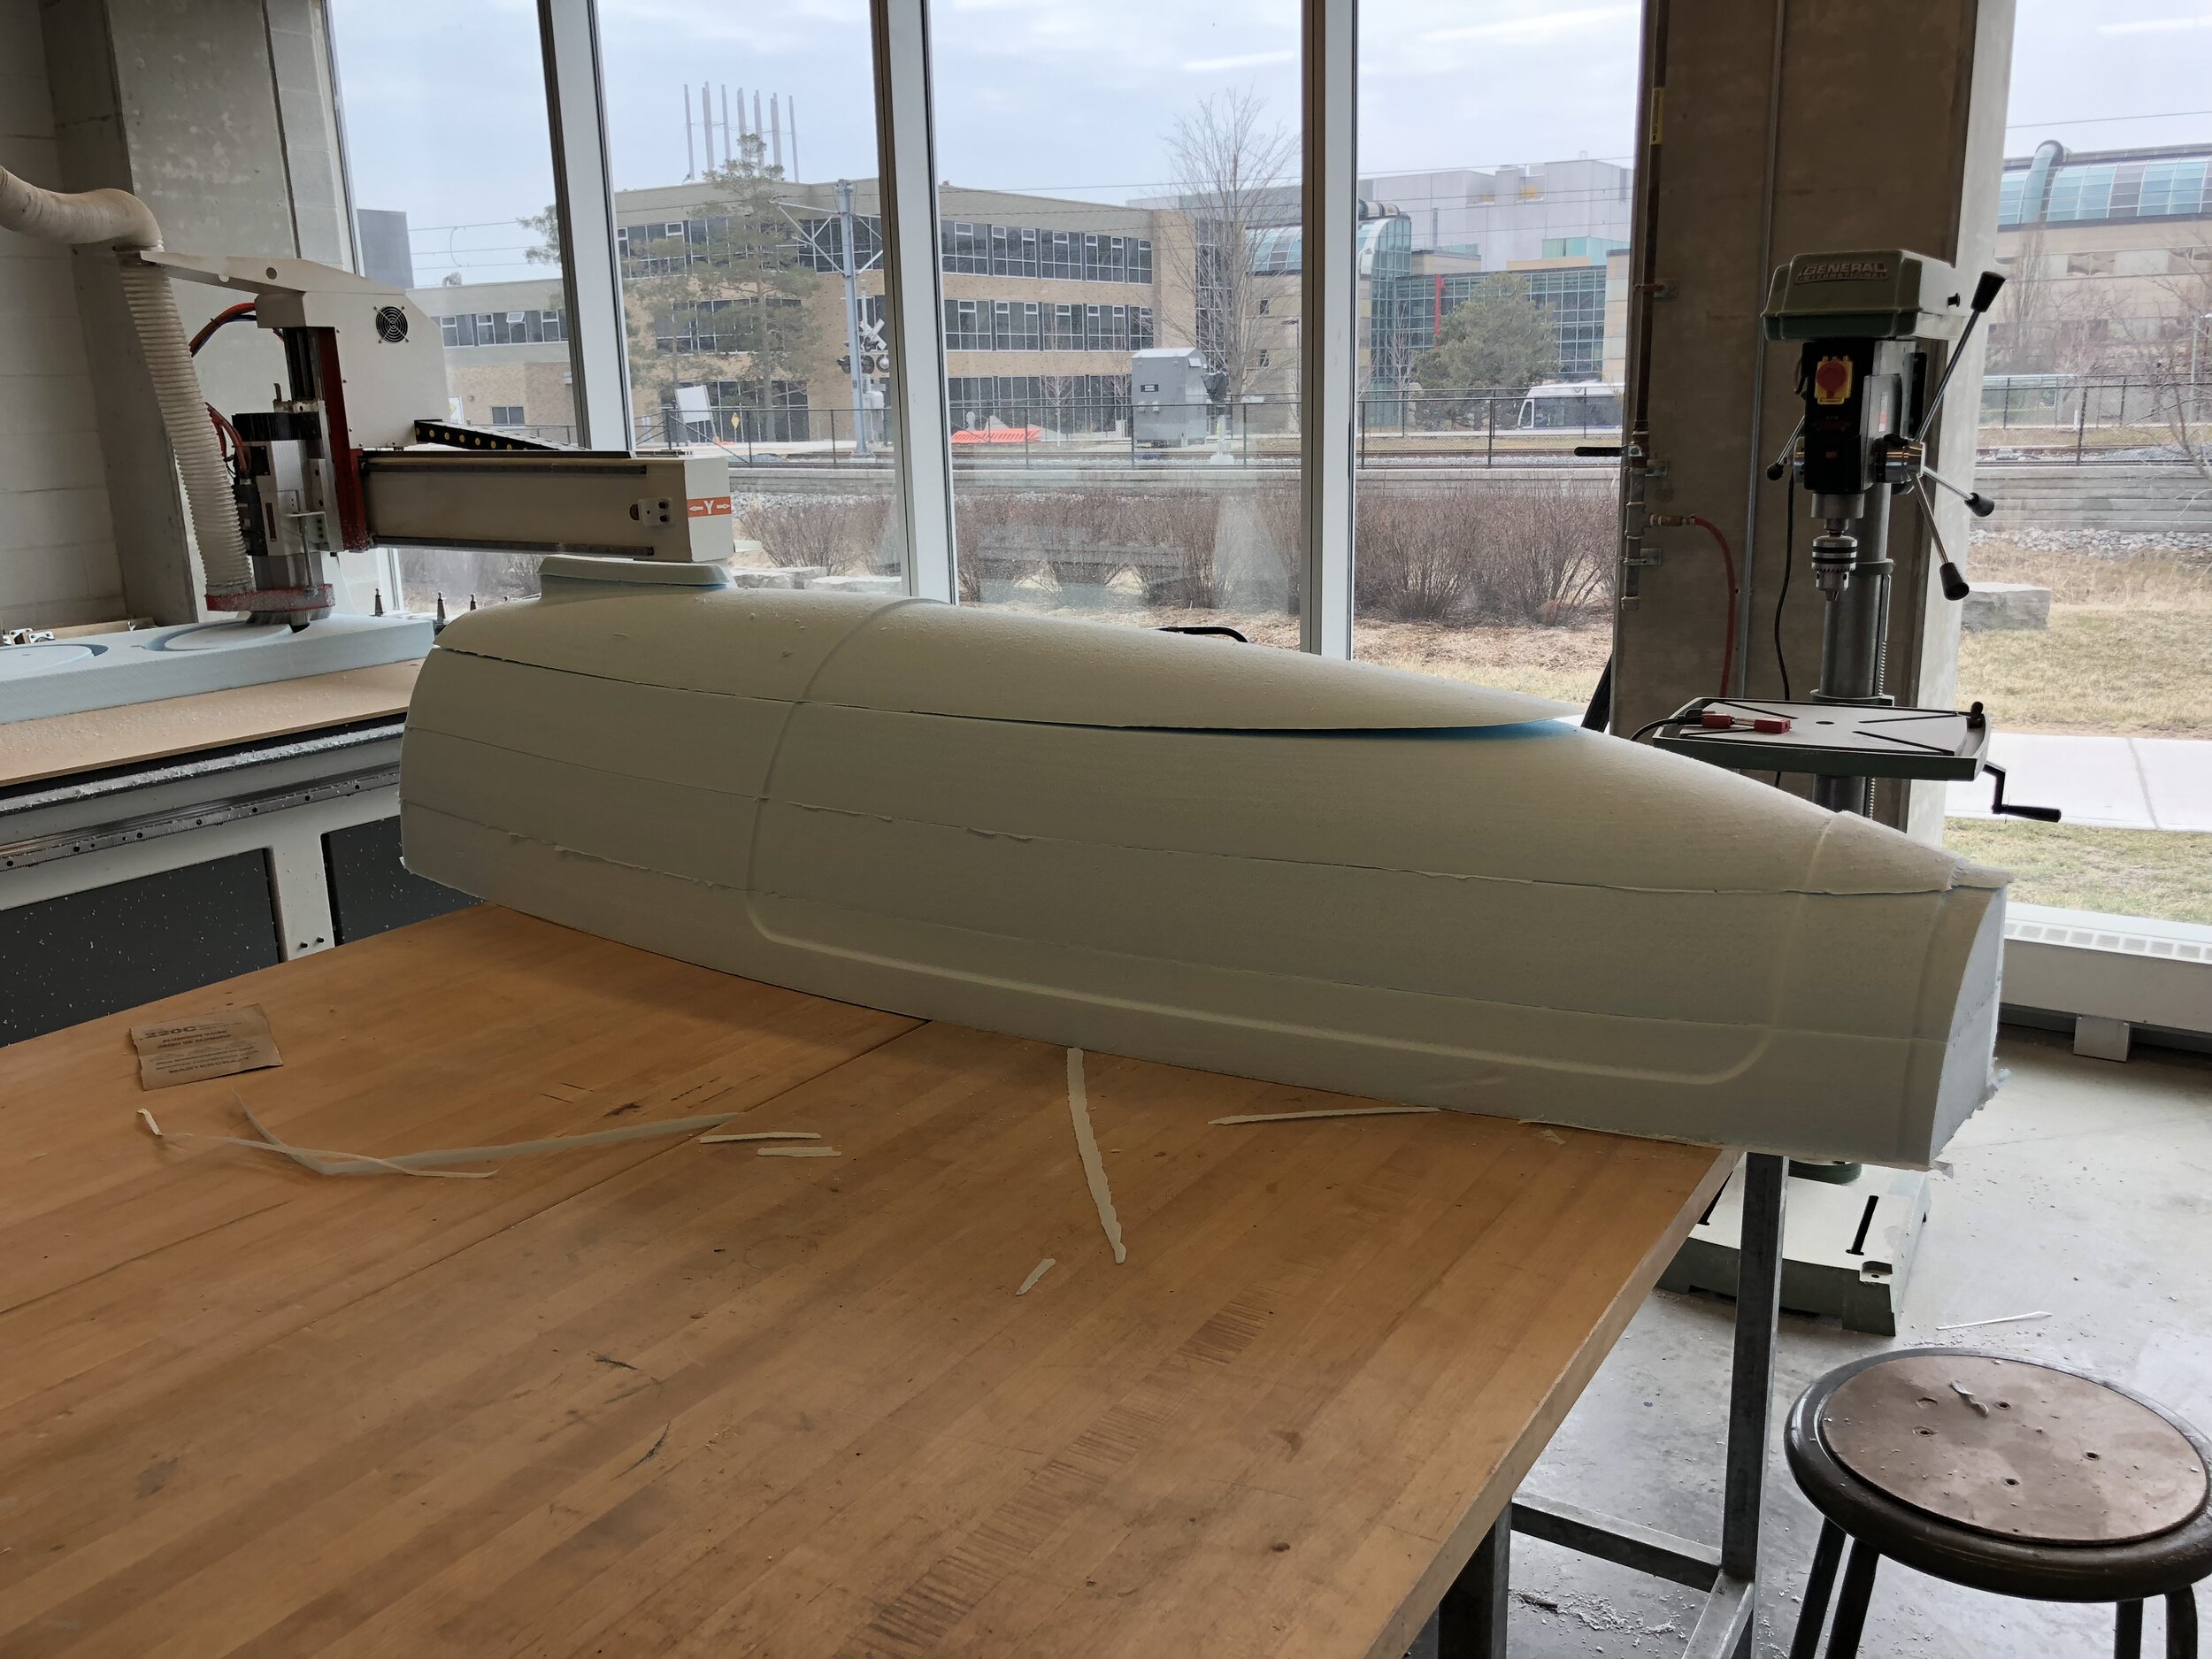
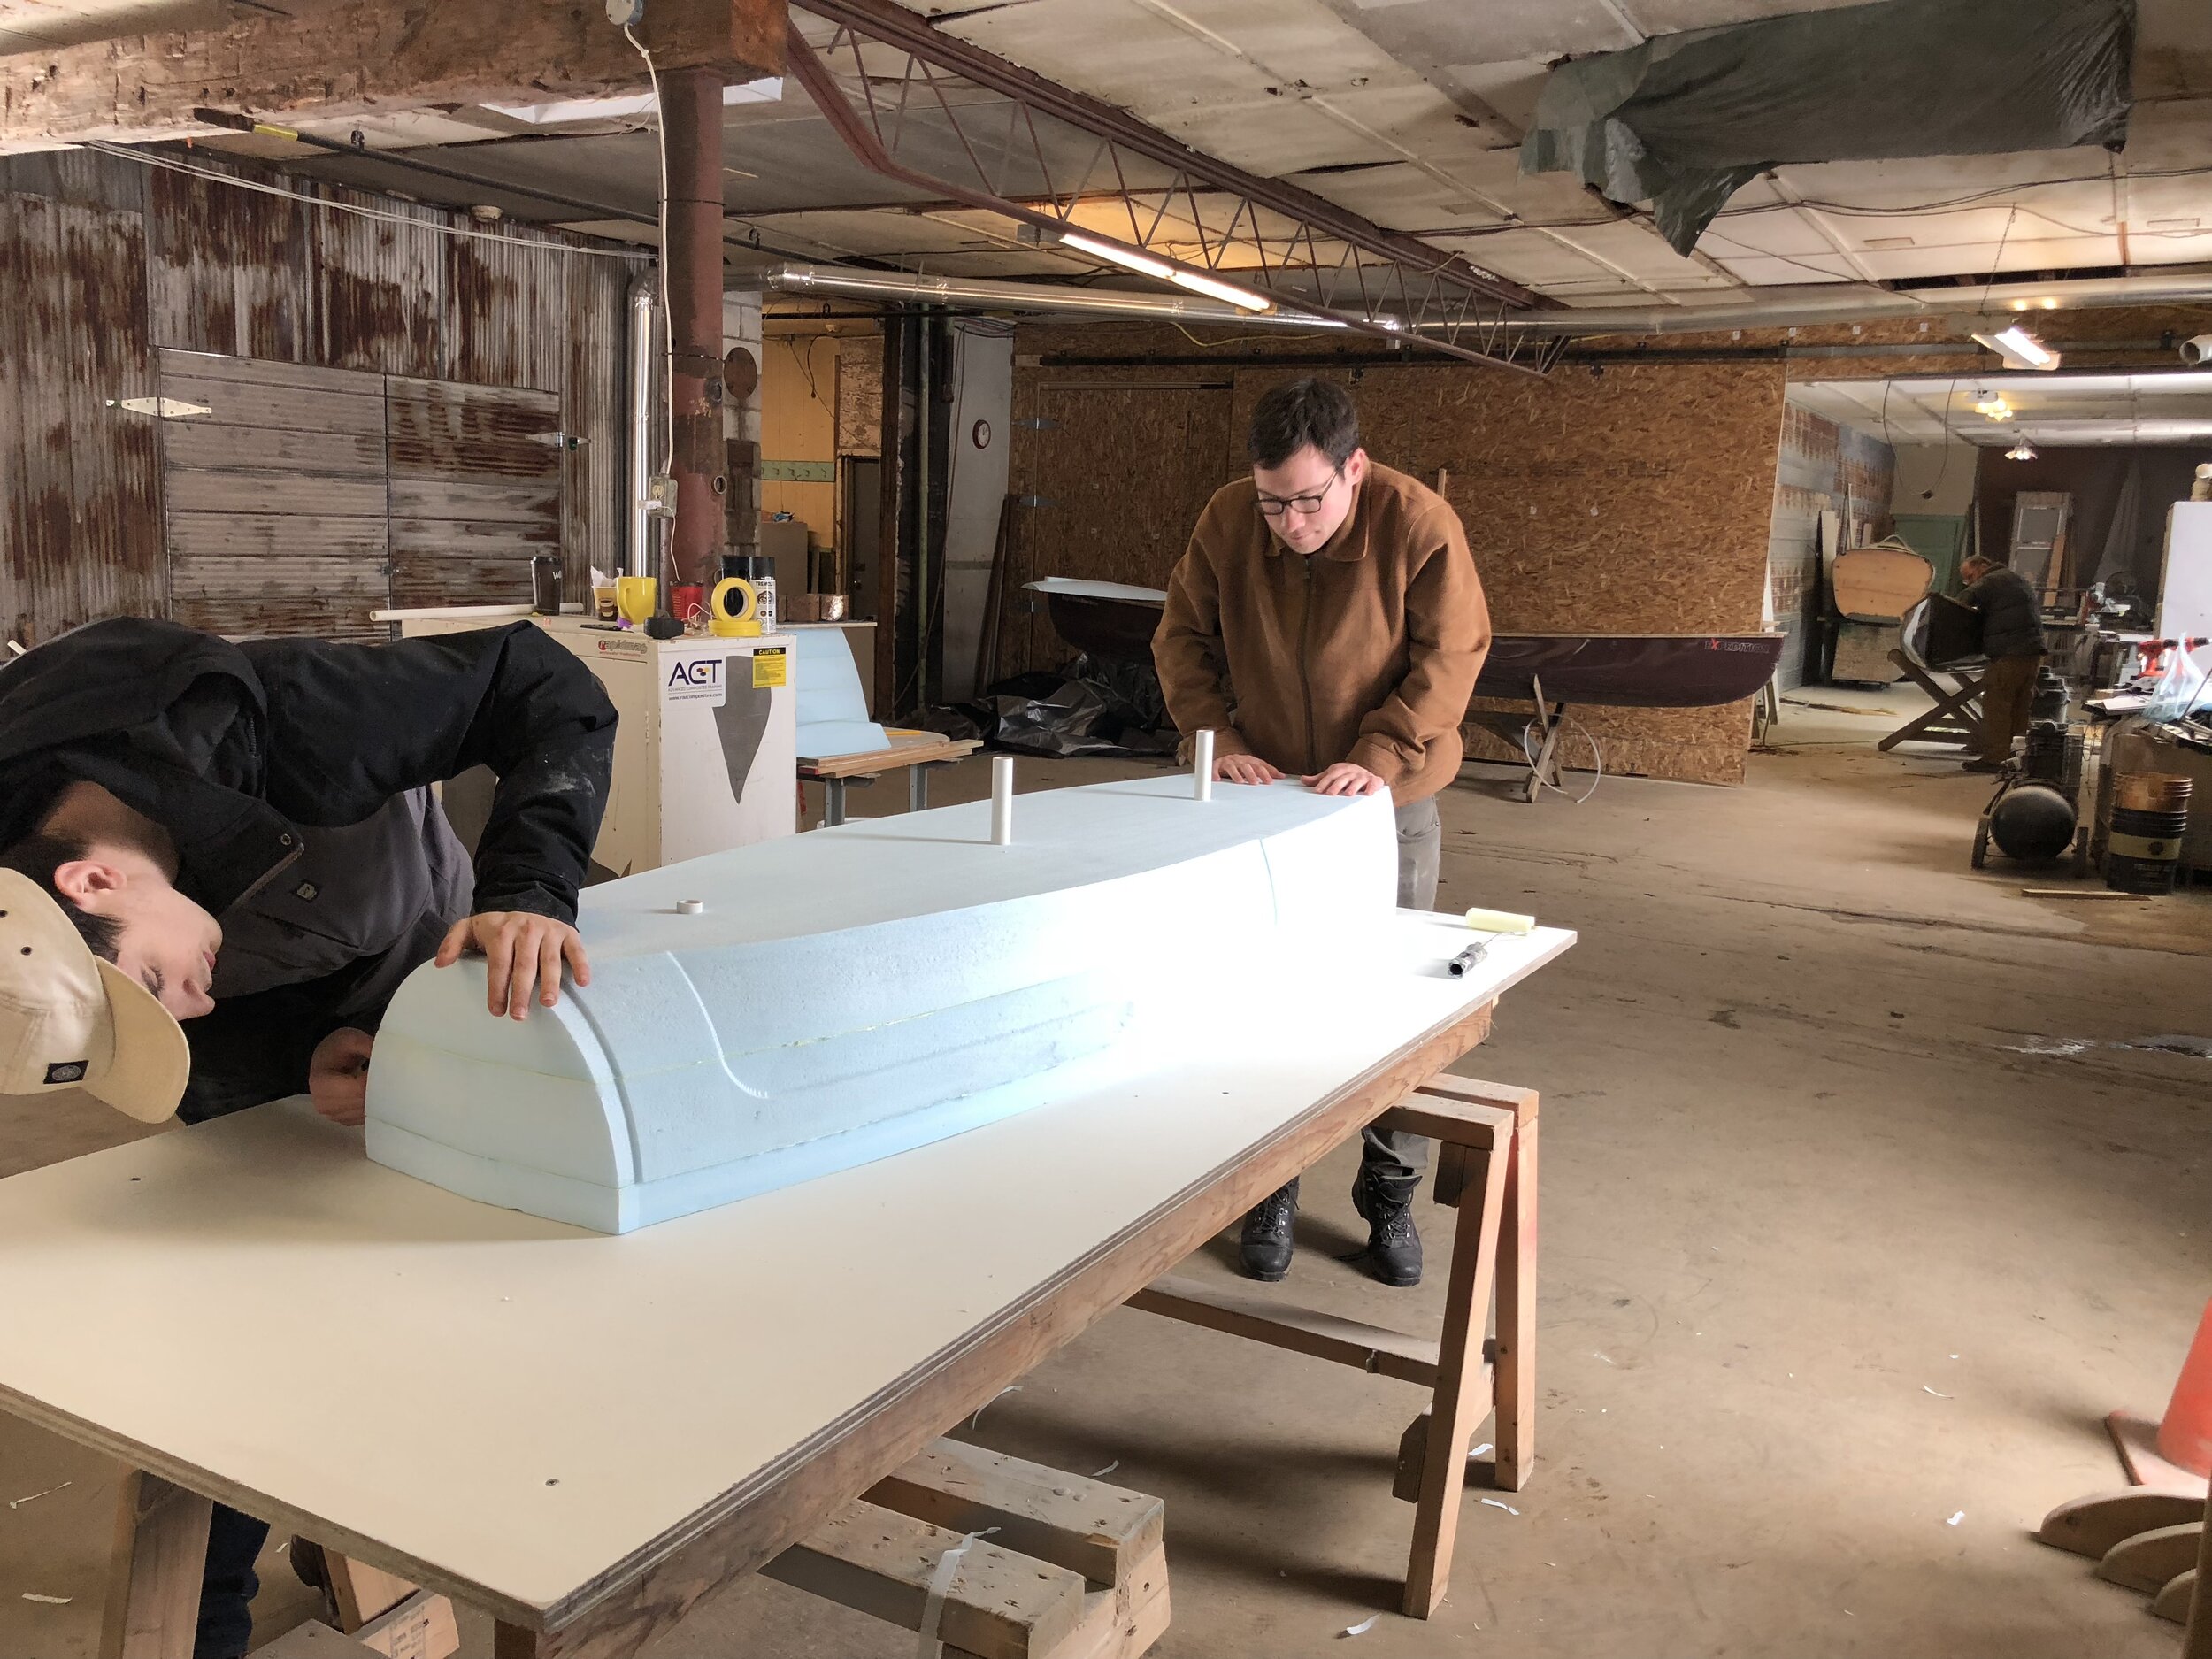
Main fuselage plug foam cutouts.
Another big change that occurred during the design of Claire came from the faculty of engineering purchasing a router, which meant we could now CNC machine parts in-house at no cost. This drove the decision to built our plug tool out of high density polyurethane foam, which only had to be sectioned into 5 sections (due to the vertical-axis limits of the router).
CNCing the plugs (as opposed to hand carving it, like we did on Bolt) also allowed us the possibility for more detailed features, such that we were able to incorporate hatch flanges, window flanges, hull mating flanges, and propulsion cutout markers into the plug. We also broke down the plug into two sections: the main fuselage and the aft. And that's right, Claire hull was going to follow the proven plug and mould method as opposed to going straight to the mould, we were really striving to follow all the best techniques.
Finally, for the first time in the team’s fabrication history, the entire fabrication process was described step-by-step and a manufacturing guide was created, which the team could refer to throughout the process and in future projects.
Putting together the main fuselage plug.

Sealing plug with fibre glass.

Body filling and sanding the plugs.
For the fabrication of the plugs, we partnered with a professional composites shop such that they would provide guidance in an effort to train our team members and maximize quality.
The foam plug was lined up using PVC pipes and datum holes in every piece, and then glued together. After that we sealed the foam with thin plain weave fibre glass and epoxy resin, which would prevent the foam from melting from the use of polyester based solvents in subsequent steps, plus provide structural integrity to the plug (it needed to be strong enough to hold vacuum, or 1 atm of pressure).
We then body filled and sanded the plug to get rid of any waviness that came from the fibre glass layer. Some of the tighter features, particularly sharp corners near the flangers were really tricky and required a lot of time to get right. This was in part a lesson for future iterations: you want large radii everywhere.

Spraying sanding primer onto the plugs.

Primed plugs ready for more sanding.

Looking good!
After body filling the fibre glass layer, we applied a primer layer of Duratec EZ sand (the white layer), this helped get rid of any remaining fibre glass weave texture and allowed us to sand to finer levels, as well as help bond the next layer of primer. Last we applied a final coat of surface primer (the dark grey layer) which we polished to a mirror shine. Yup, that was a ton of sanding, the team’s patience surely tested.
You can observe on one of the pictures above that the plugs started to look orange, this is because we applied a light orange paint layer in between layers of sanding primer to tell how deep we were sanding (we did multiple layers of sanding primer).

Primed main fuselage plug.
Primed aft plug w/ flanges.

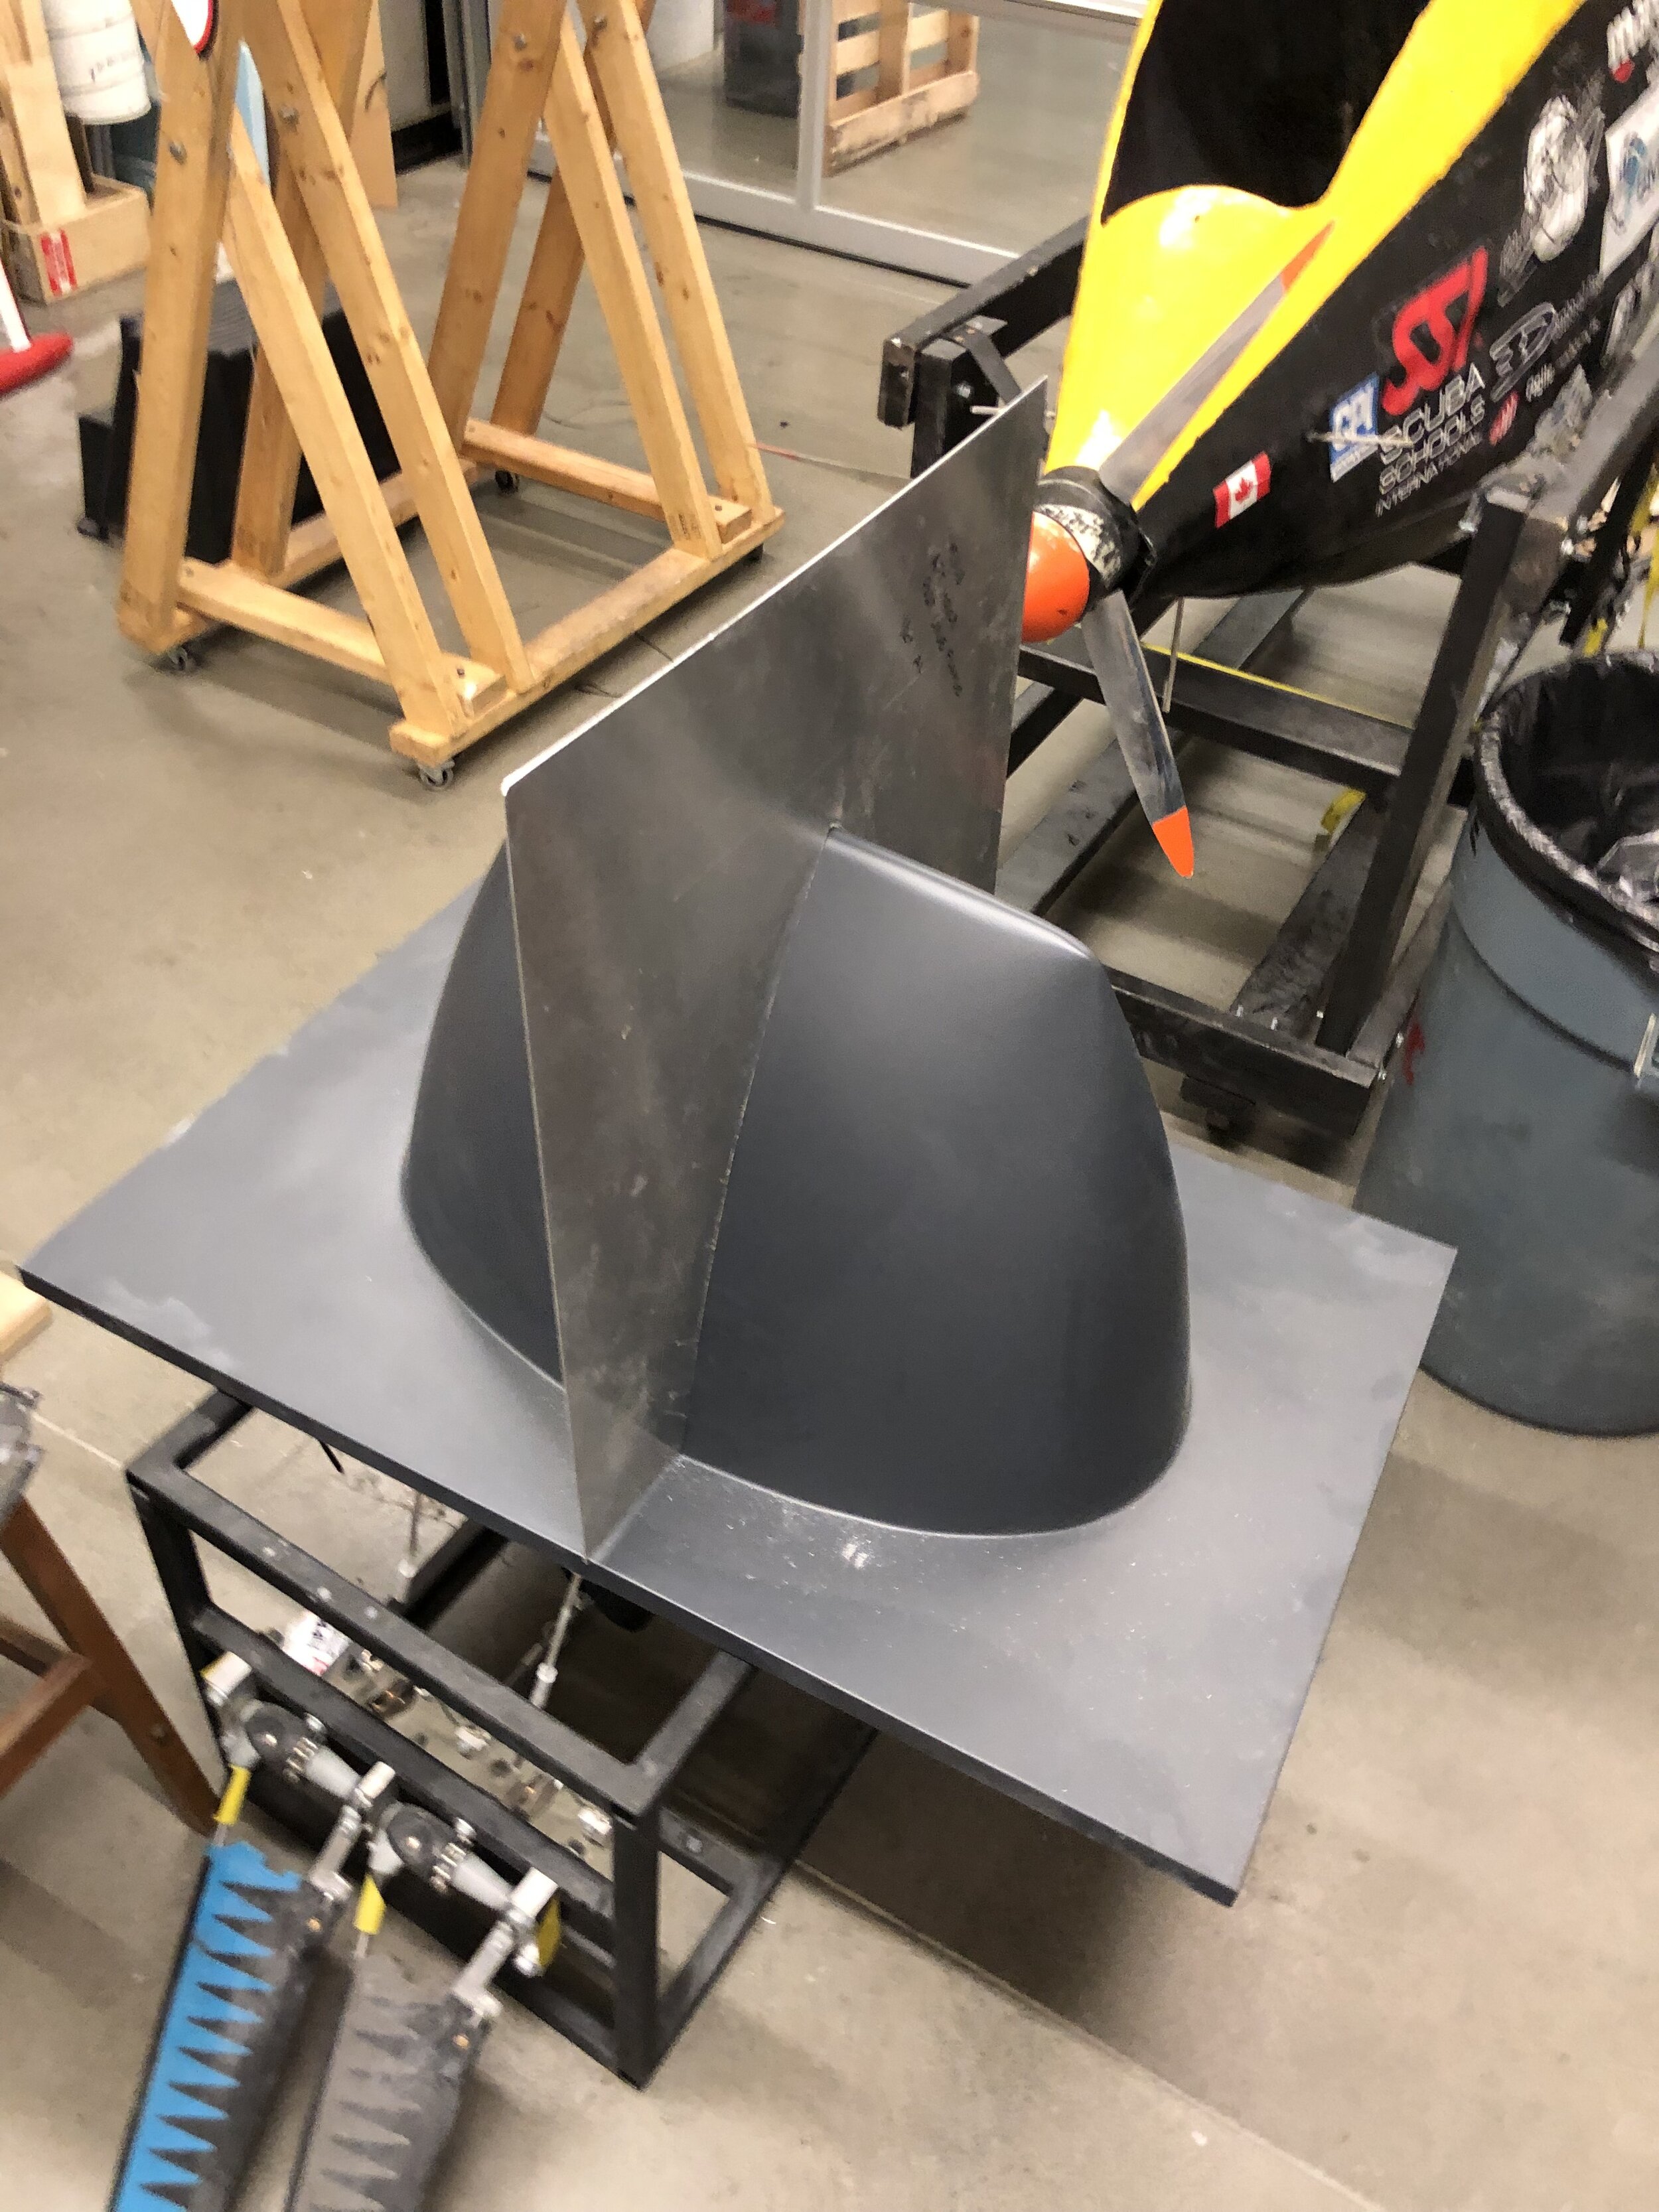
Main fuselage flange.
The last step left on the plugs was to create a flange. Because we had undercuts in the main fuselage plug, and to make demoulding of the aft easier, we decided to part the mould in half and this required a dividing flange. The flange was made out of gauge sheet metal aluminum which we cut using shears and contouring the plug using a sharpie. The non-porous and smooth surface of the sheet metal meant that it could be used during the mould layup process (as opposed to porous wood). Lastly we secured the flanges to the base of the plugs using machine screws and an acrylic filler to ensure no gap between the flanges and the plugs was left.

Waxing the plug.
Wet layup in progress.
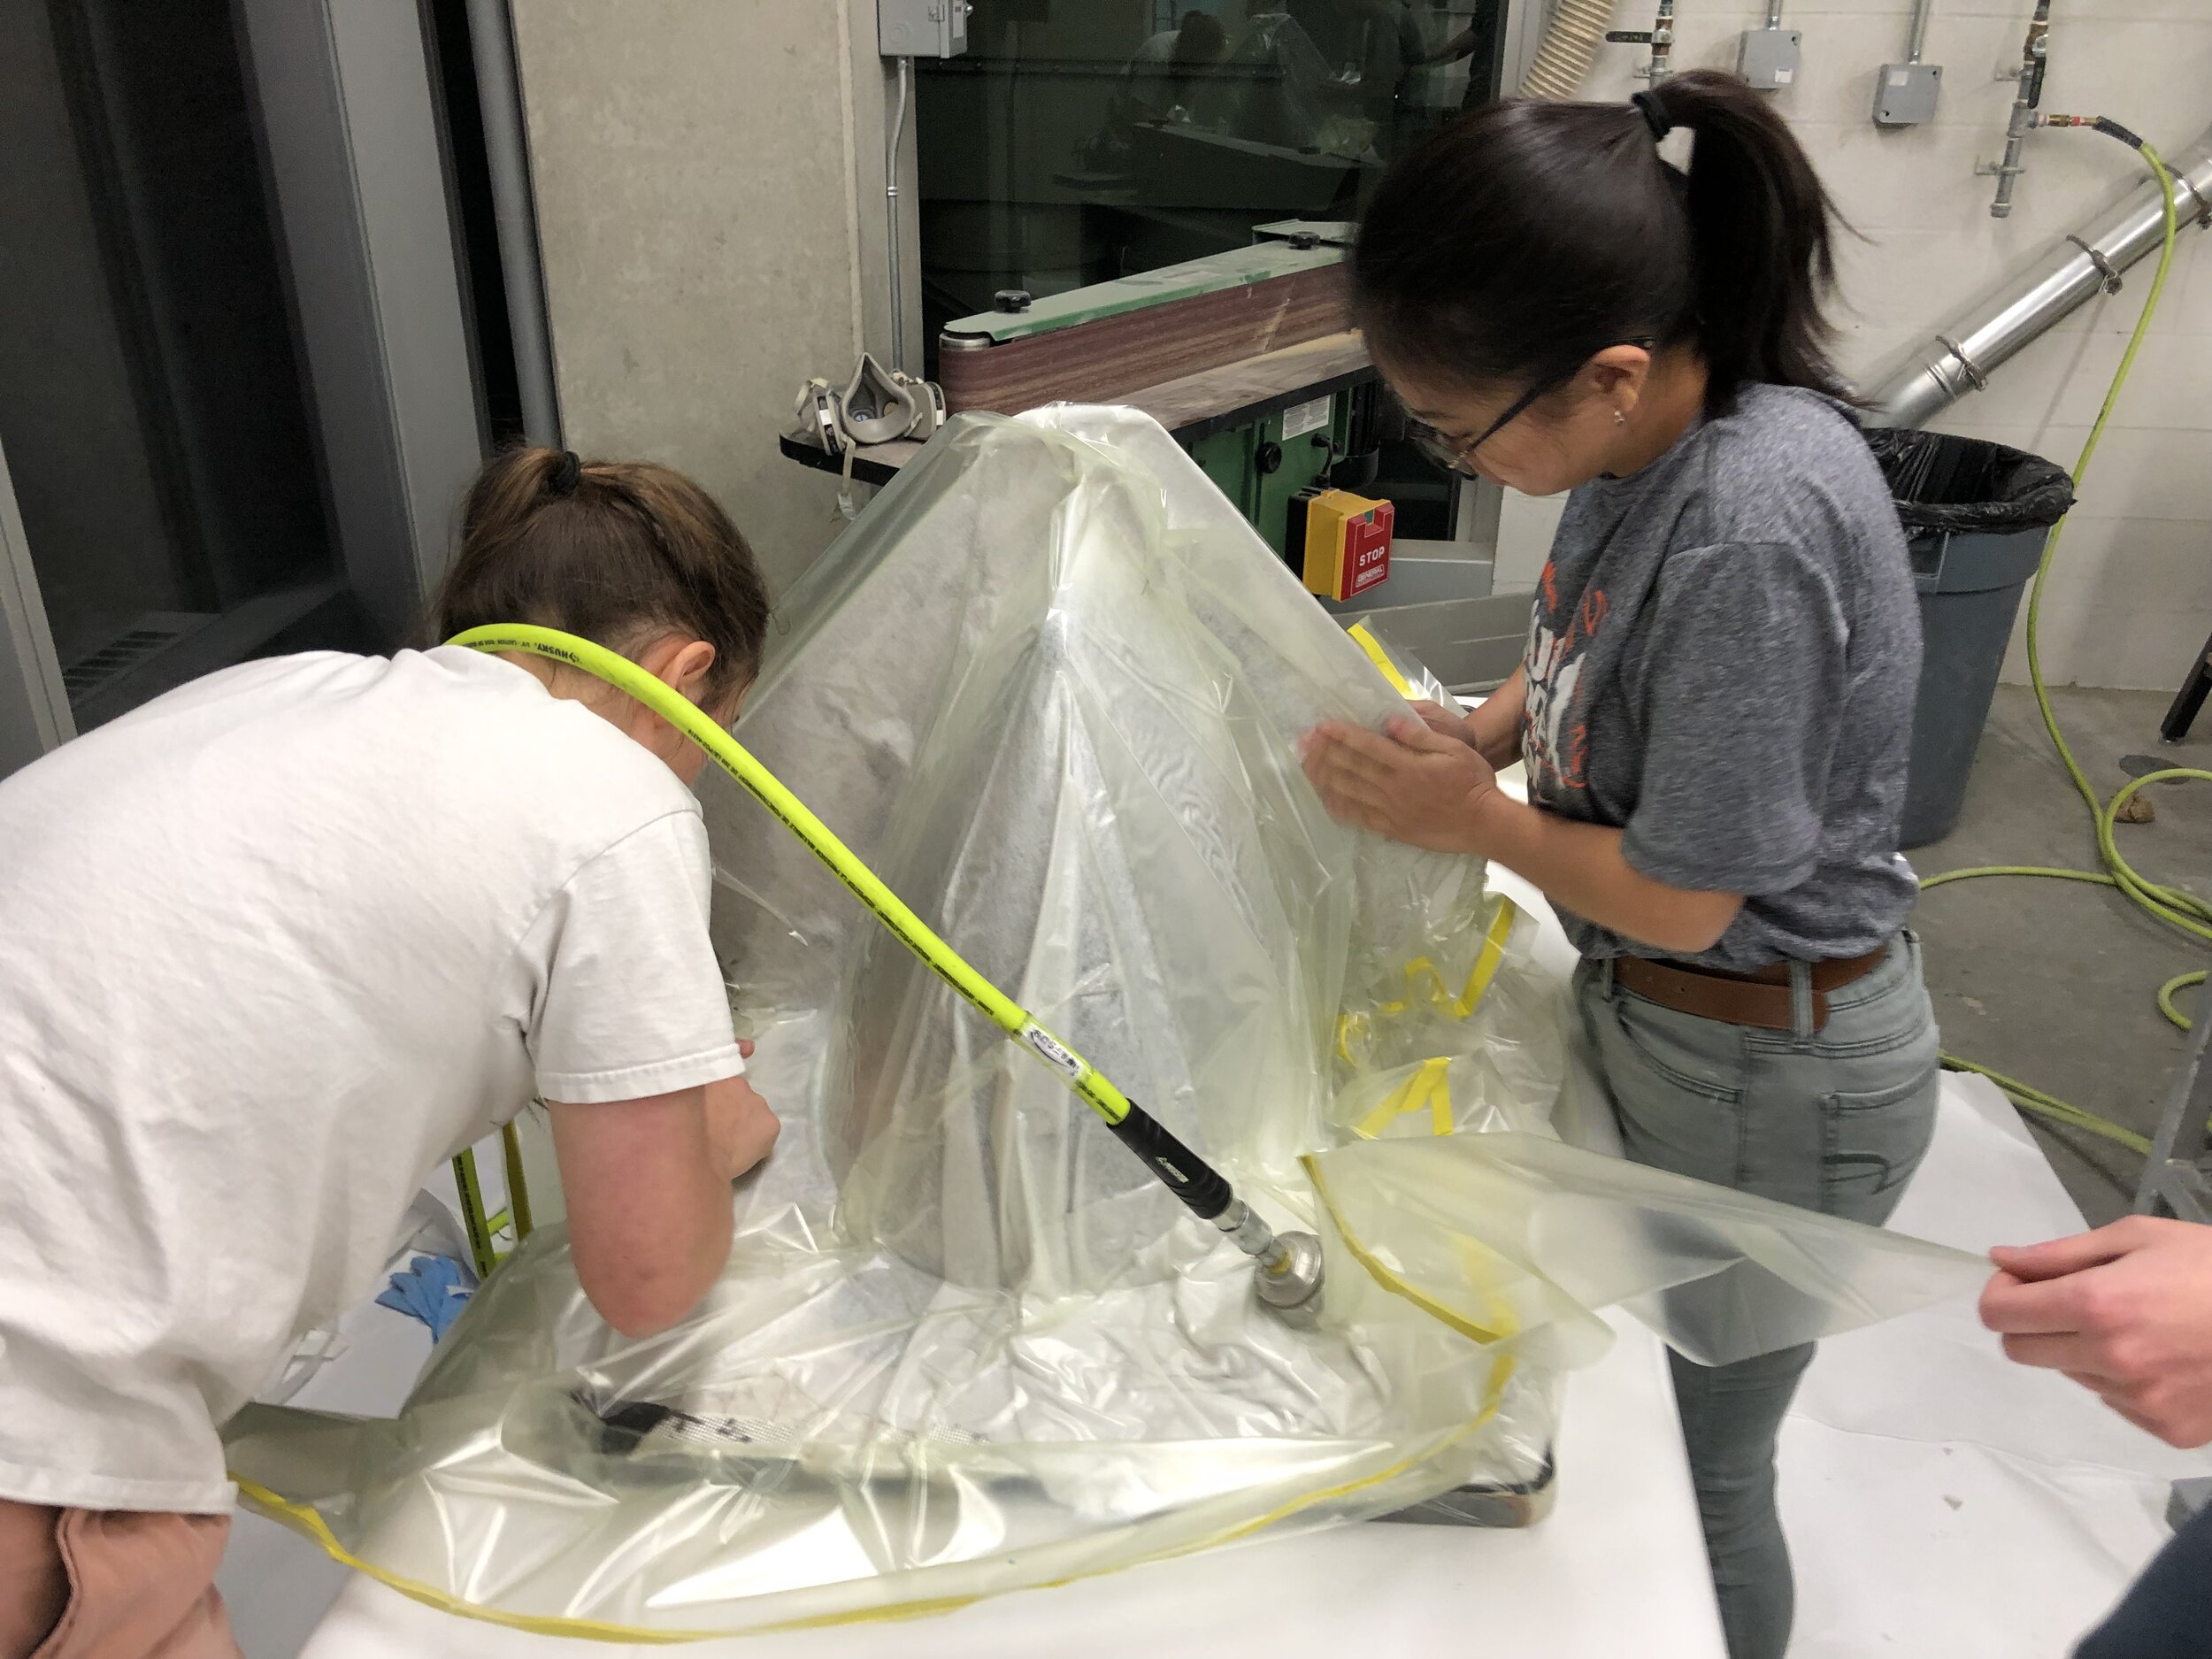
Vacuum sealing the plug.

Final mould.
The mould fabrication process was pretty textbook:
Wax the plug and flange, spray with PVA on top
Put down gelcoat, and thicken the gelcoat around sharp edges using cabosil / silica or other
Place plain wave fibre glass on top and wet with epoxy
Place under vacuum and allow to cure

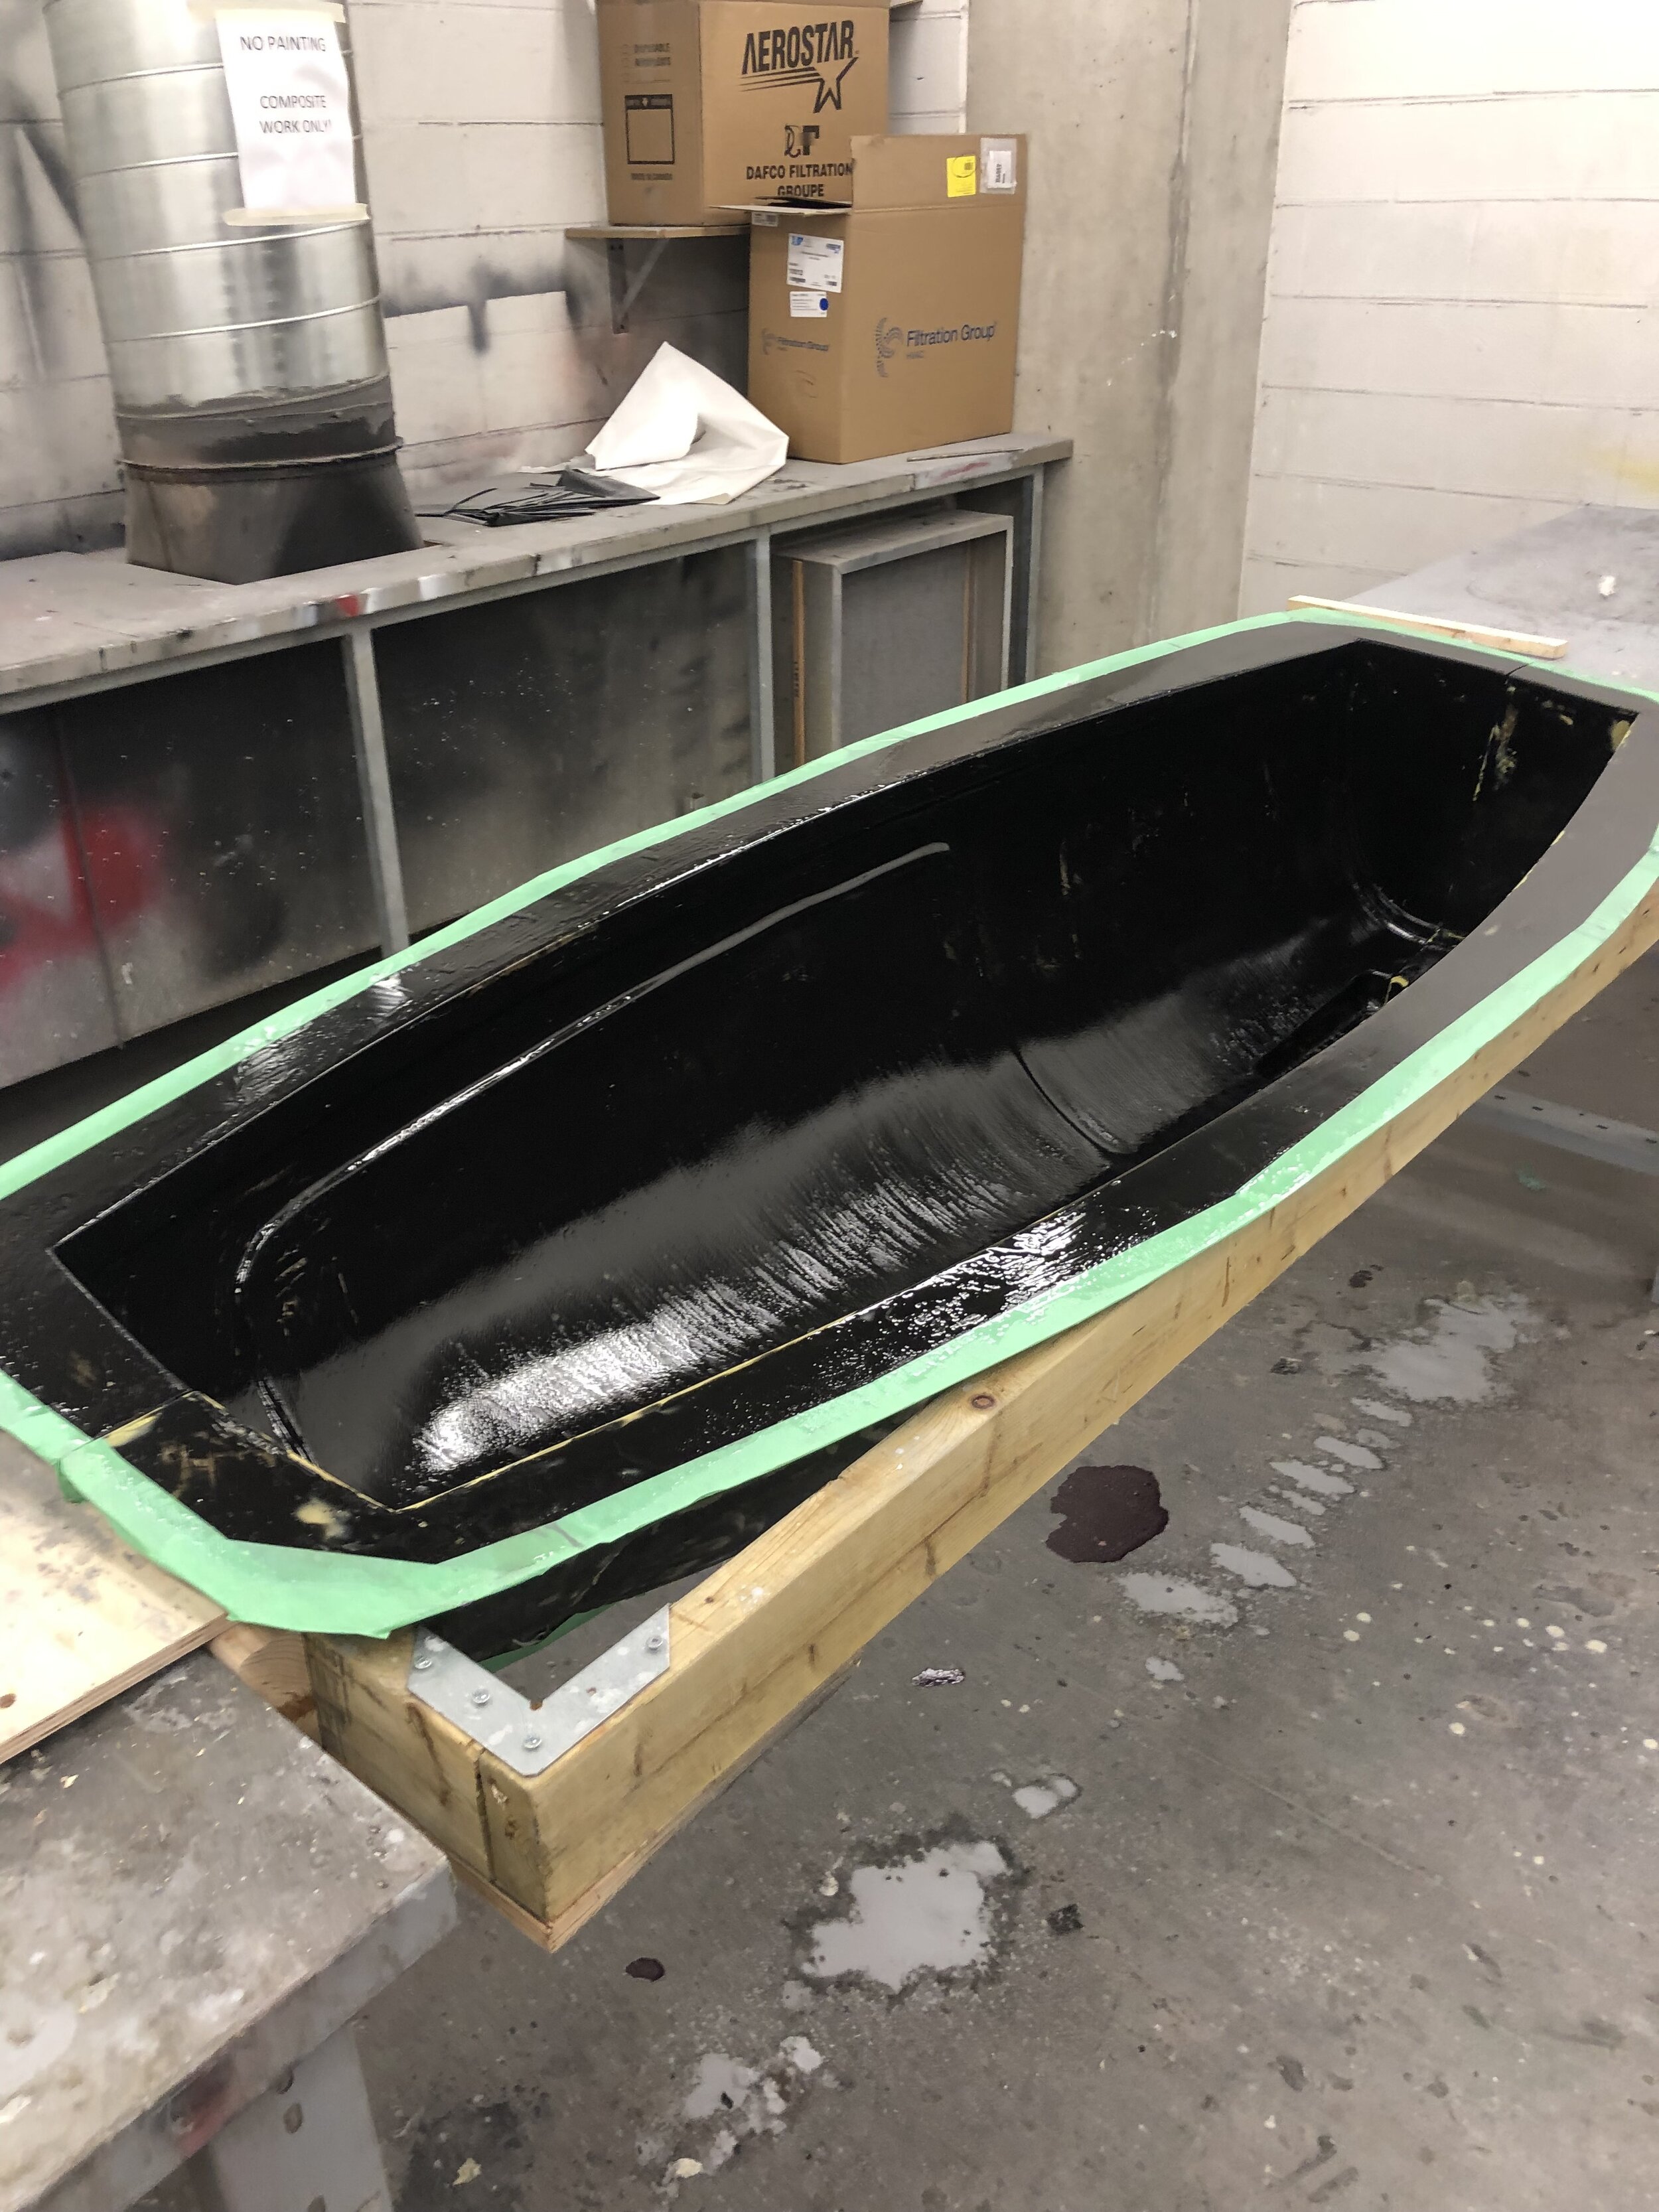
One half of the main fuselage mould, outside, black gelcoat.

Final main fuselage mould cavity.
The final moulds were really good. Impeccable mirror surface finish and a minimal gap line. This was by far the best work the team had ever done on the hull.
We also decided to go with an infusion layup, and switched to waxing our moulds plus also spraying them with PVA to help with demoulding (demoulding had been a big problem for the past two submarines). For the first time we also used clear gelcoat by spraying it onto the cavity before the infusion, this would give the carbon fibre a shiny finish as well as provide UV protection.
The ply schedule for this year was similar to that of Bolt’s, with a 4 layer, 250 gsm, twill weave carbon fibre composition. Reinforced with polyurethane foam core around the edges of the hatch, around areas that required extra stiffness (such as propulsion mounts), and in strategic areas to balance the buoyancy of the submarine. Additionally we placed a light plain weave layer of fibre glass on the outside for additional protection and should any body work would be required (it’s easier to sand glass than carbon). Last, instead of bonding components to the hull, we decided to embed aluminum blocks with tapped holes to it, these also had to be placed during the layup process.
PVA + Clear gelcoat on the mould.

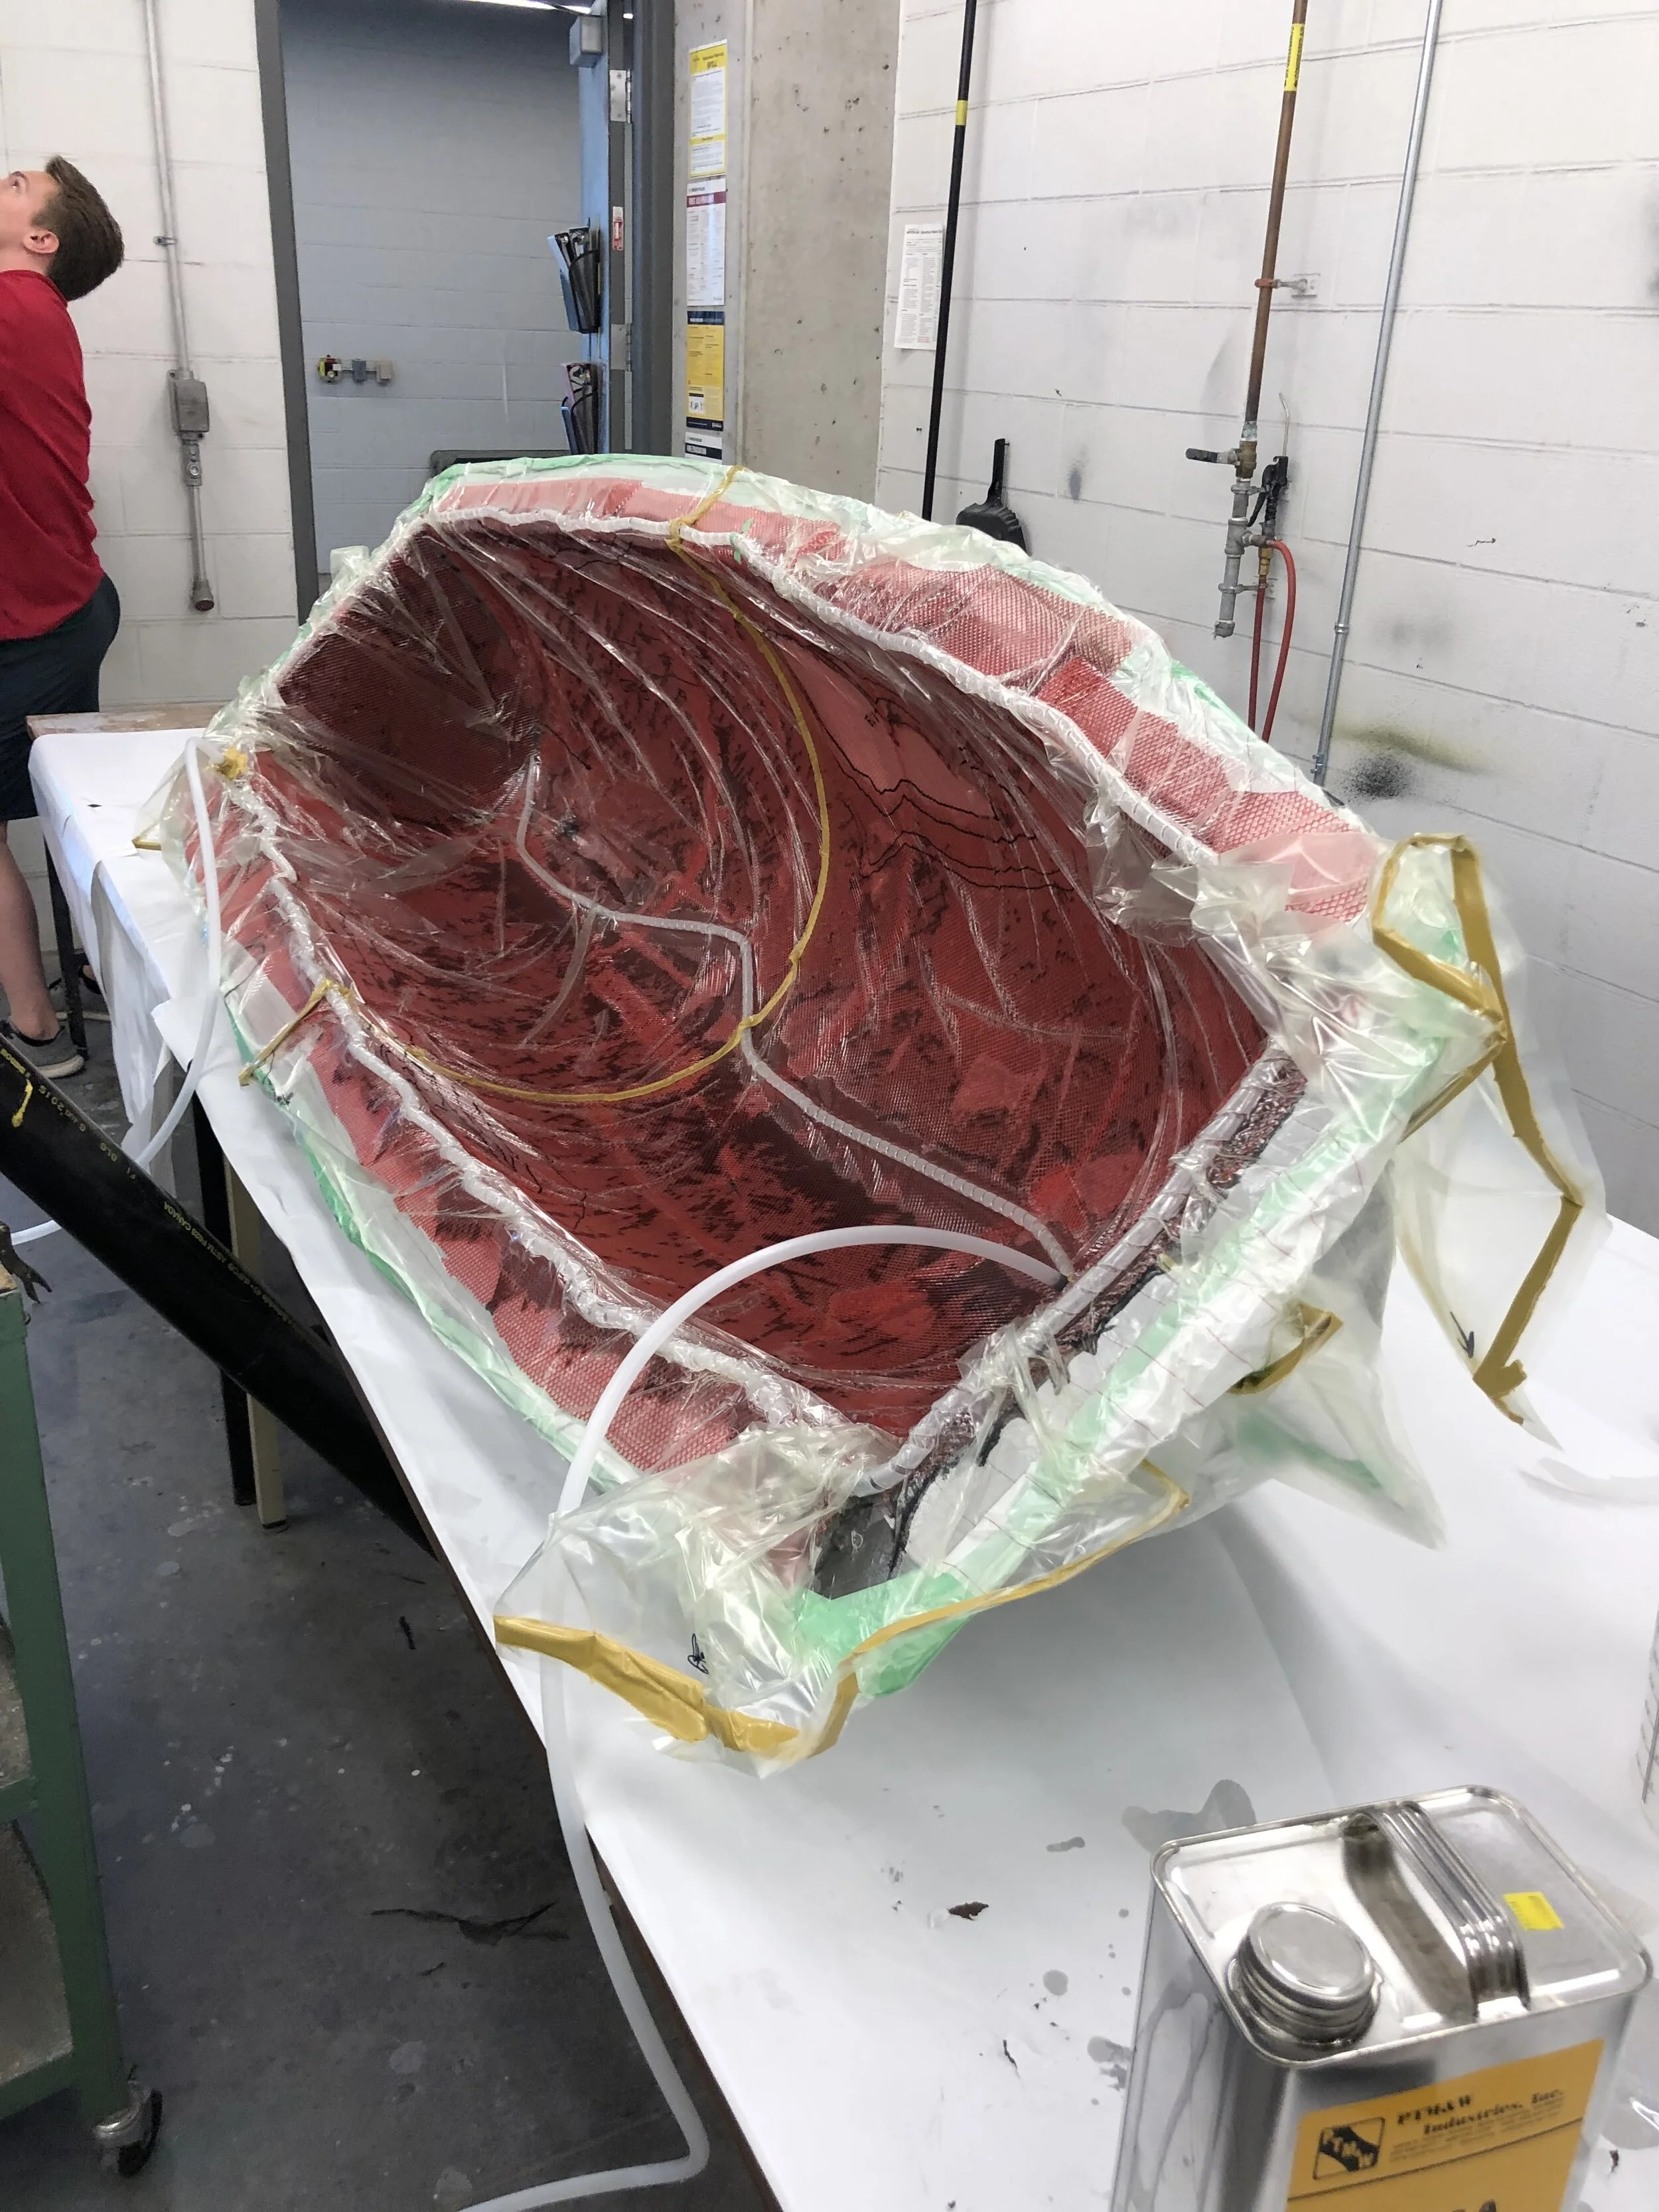
Fibres and core going into the mould.

Mesh and infusion lines routing.
The infusion process was flawless, with the biggest difficulty being putting together a vacuum bag big enough to fit the entire mould. After saturation we placed UV lights to warm up the mould to temperature and help the cure process, before demoulding 12 hours later.

Main fuselage under vacuum.
Saturated main fuselage.

Main fuselage curing.
As we do every year, we brought all the muscle available to demould the fuselage, but to our surprise it was really easy. The PVA and split mould worked wonders.
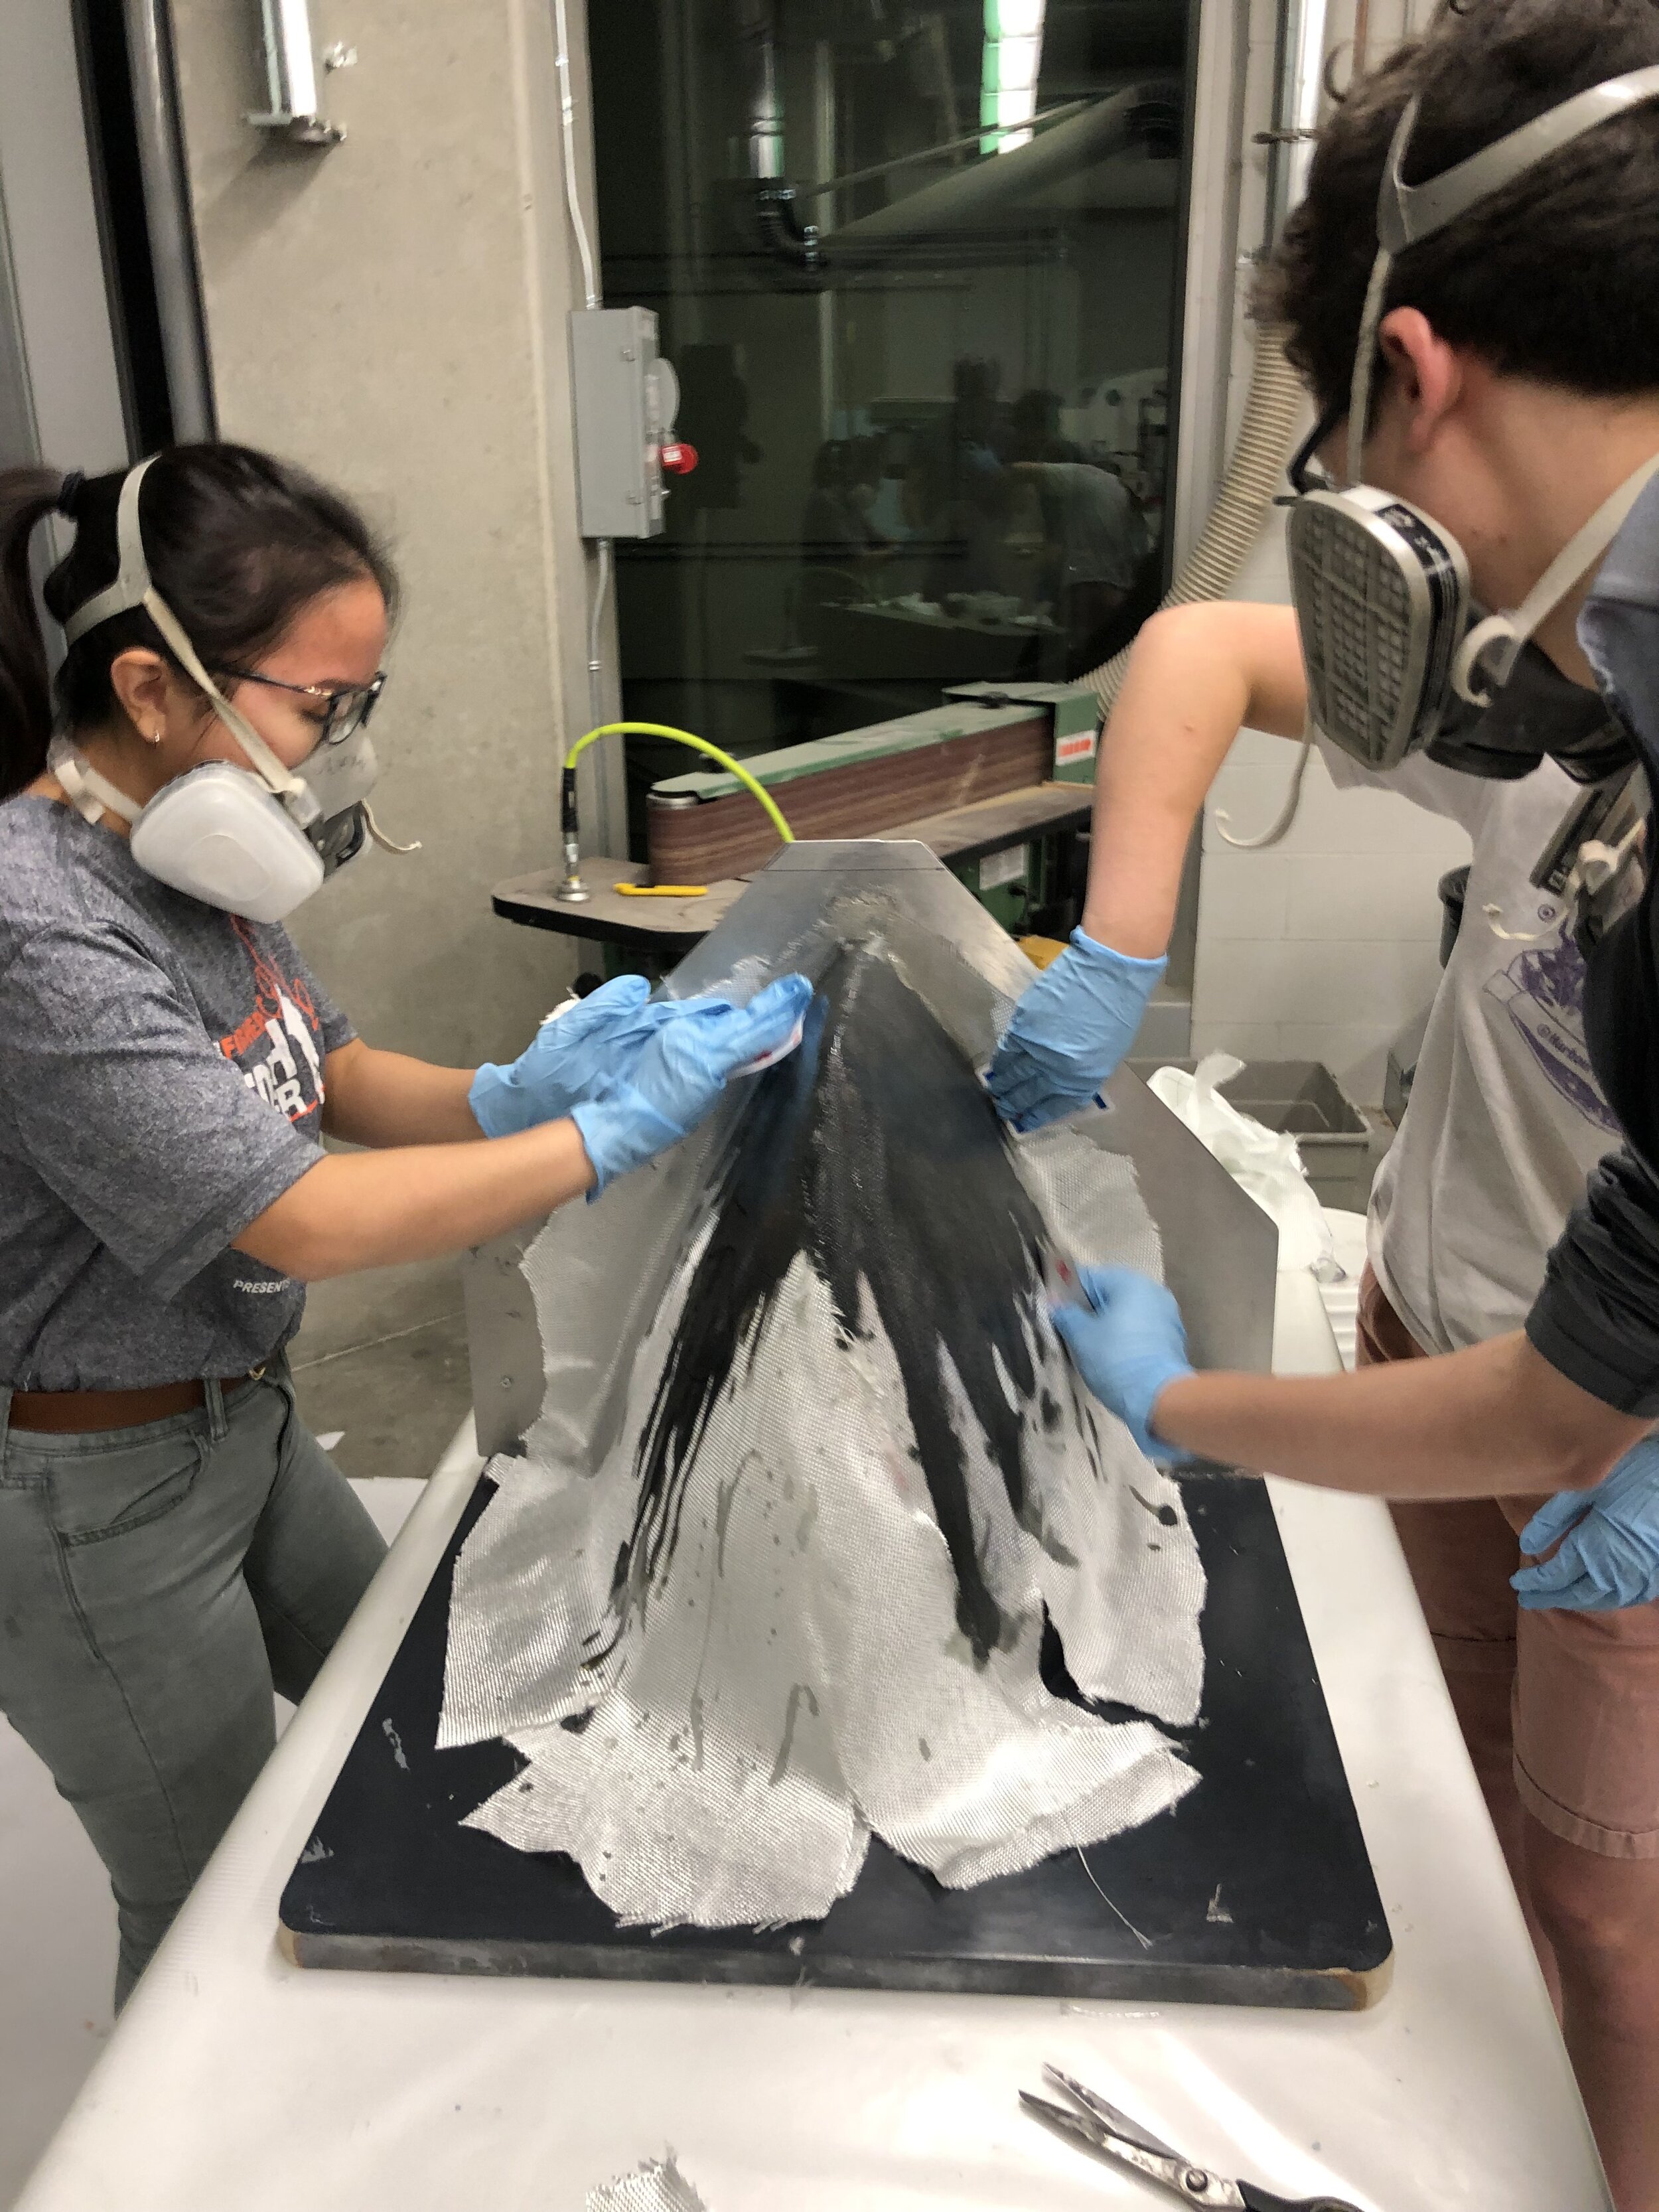
One of the fuselage sections had to be reworked due to dry spots, you can observe this on the picture below (because the exterior surface of the laminate sandwich was fibre glass, it really shows which spots are dry, look for white). Because the dry spots had a grid pattern, this was attributed to the epoxy resin struggling to get past and under the foam core (even though we drilled holes through the foam). Most of the areas could be fixed via injecting resin with a syringe (you need a really big syringe due to the viscosity, a horse syringe works well if you have access to one).
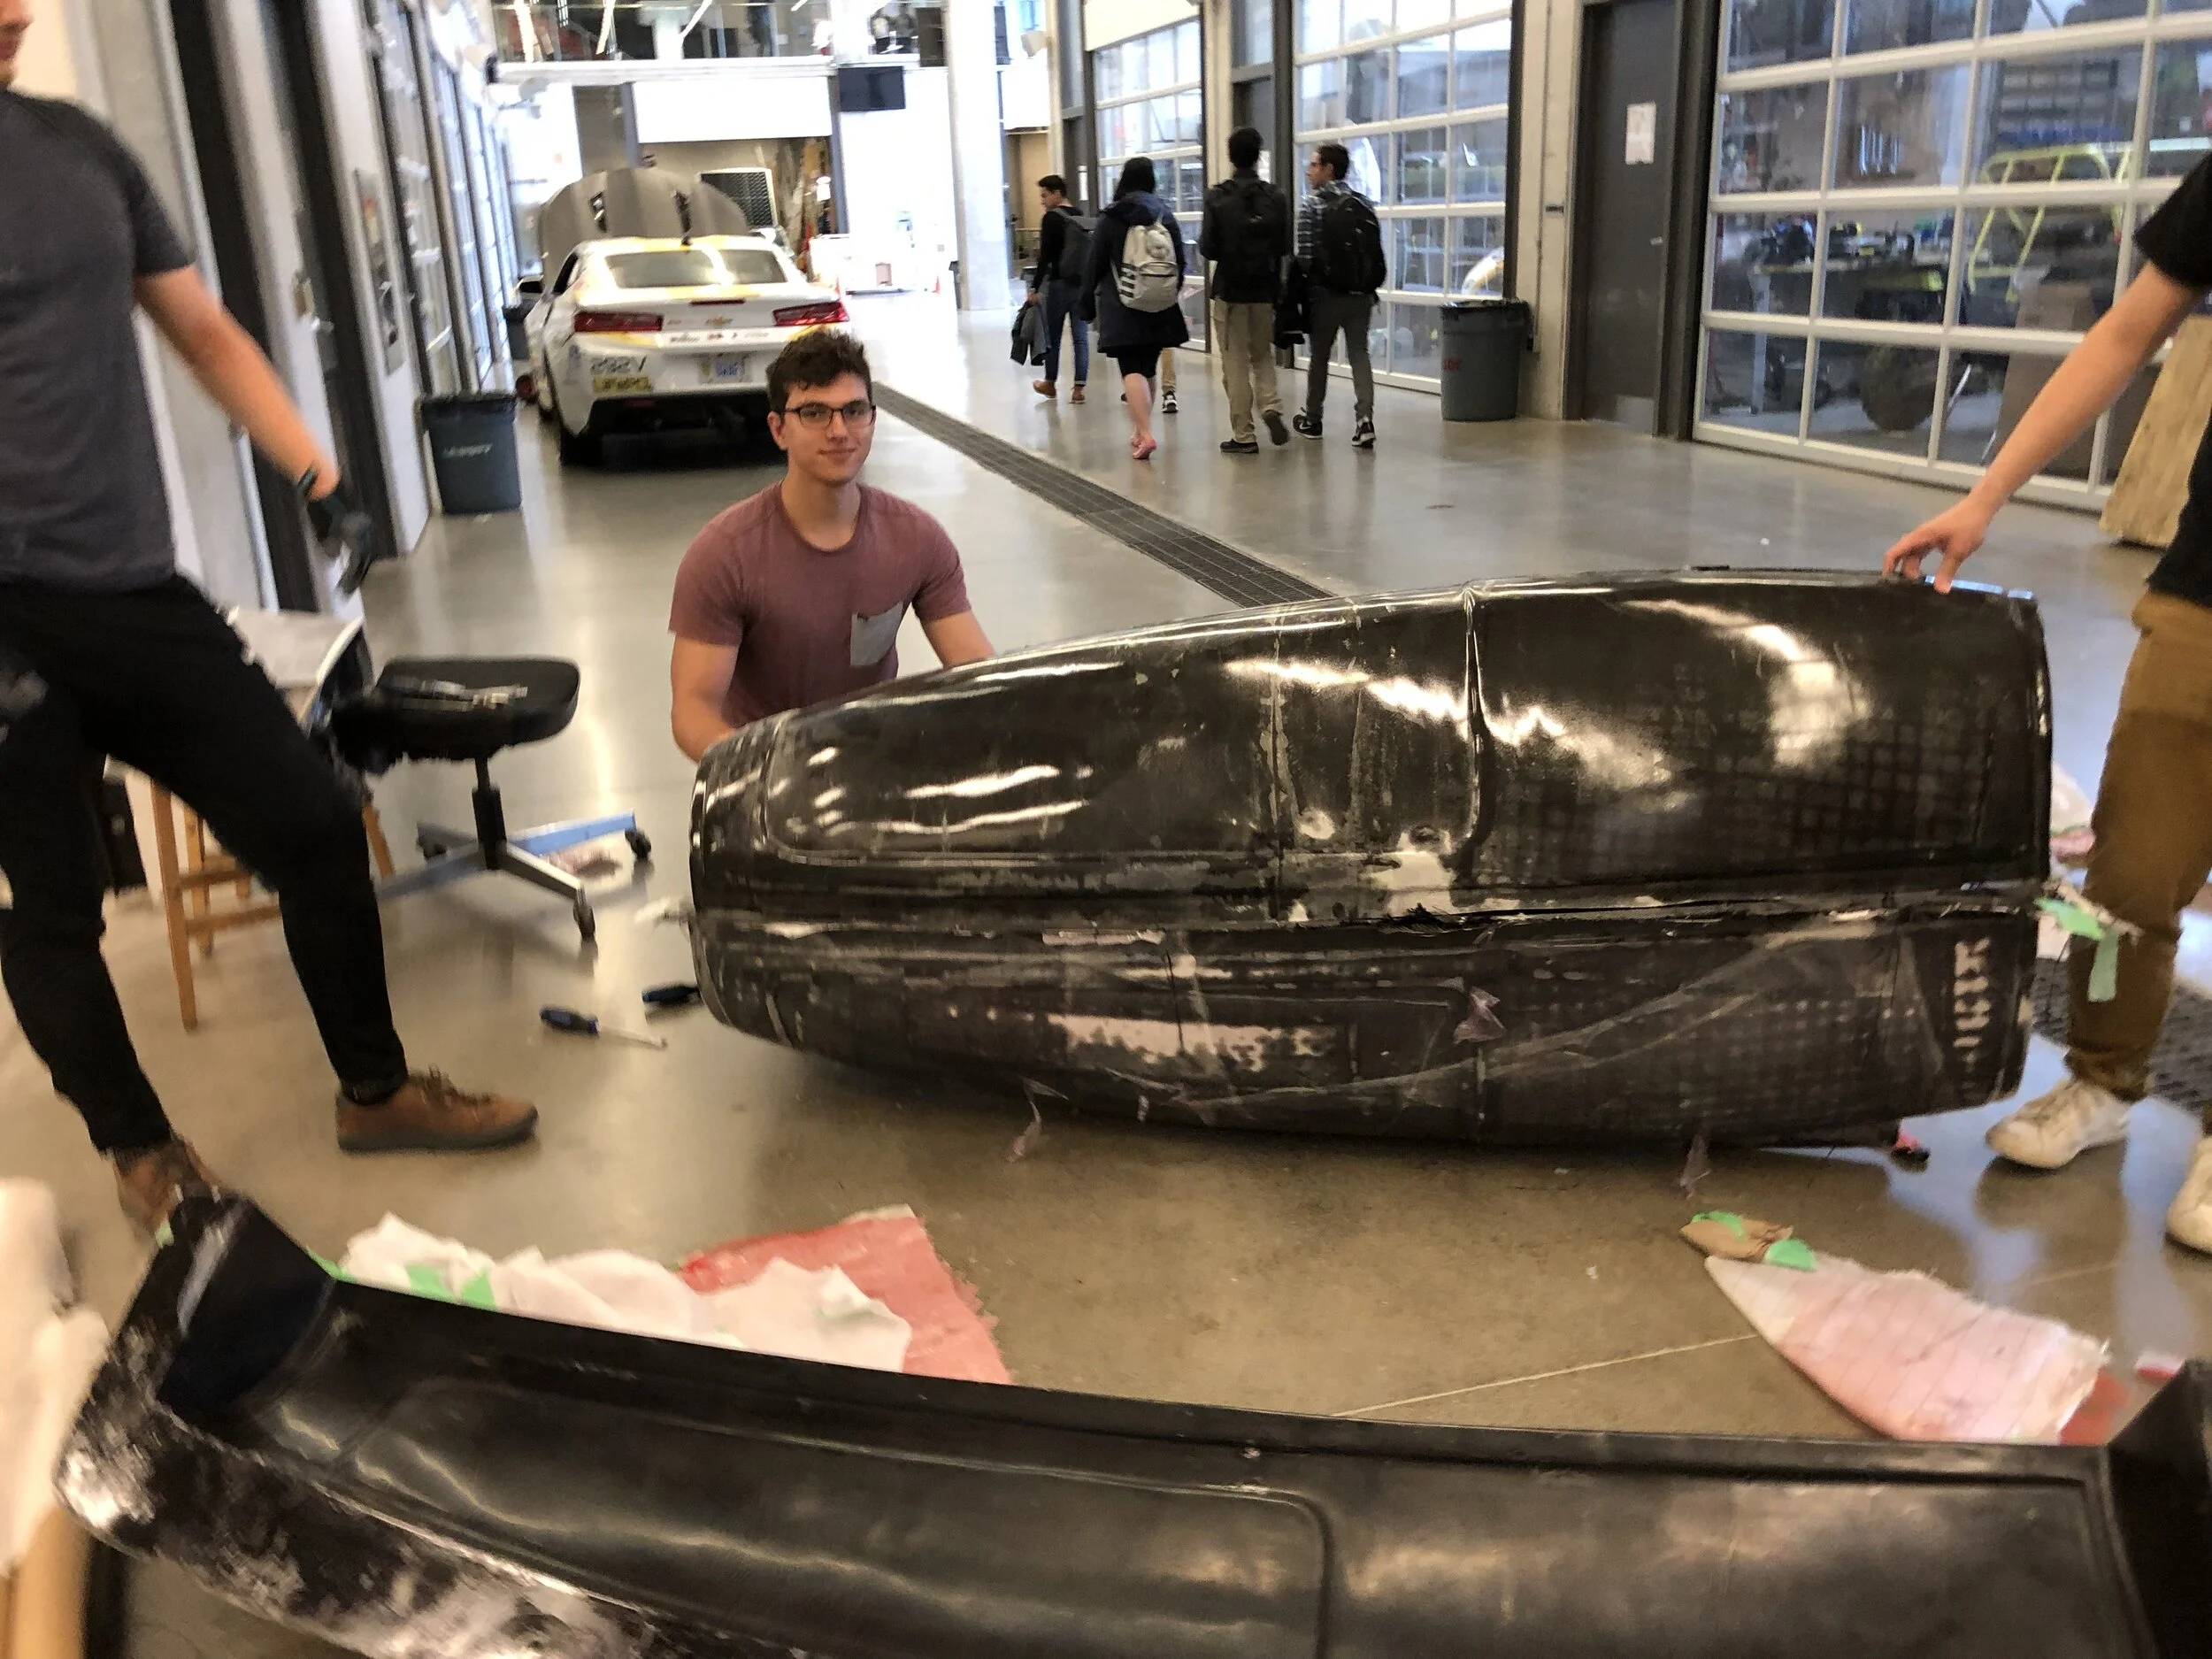
Demoulding party.

Top fuselage trimmed.

Hatch layup in progress.
Because the mould had a built in flange feature for the hatch, this meant that the actual hatch (the door that the pilot uses to go in and out of the submarine, and that divers use to repair the submarine) needed to be done in a separate operation. For this we went back to the plug and used it as a male mould to form a fibreglass hatch. In order to be able to reinforce the hatch with foam core (both for stiffness because the pilot usually rests against the hatch, and for buoyancy which helps the hatch open easily while underwater) we had to make two fibre glass hatches on the plug, and then stack foam in-between and glue it all together, this turn out pretty good.
Since we used the same mould to make both the top and bottom sections of the fuselage, the bottom section had the same hatch flange feature but no hatch. For this we used the hatch cutout of the top section and glued it on to the bottom section, plus did some body filling work to ensure flushness.
Another improvement that year was that the faculty of engineering invested on a paint booth large enough to fit our submarine, so our painting process improved substantially.

Fuselage marriage.

Filling the bottom fuselage.
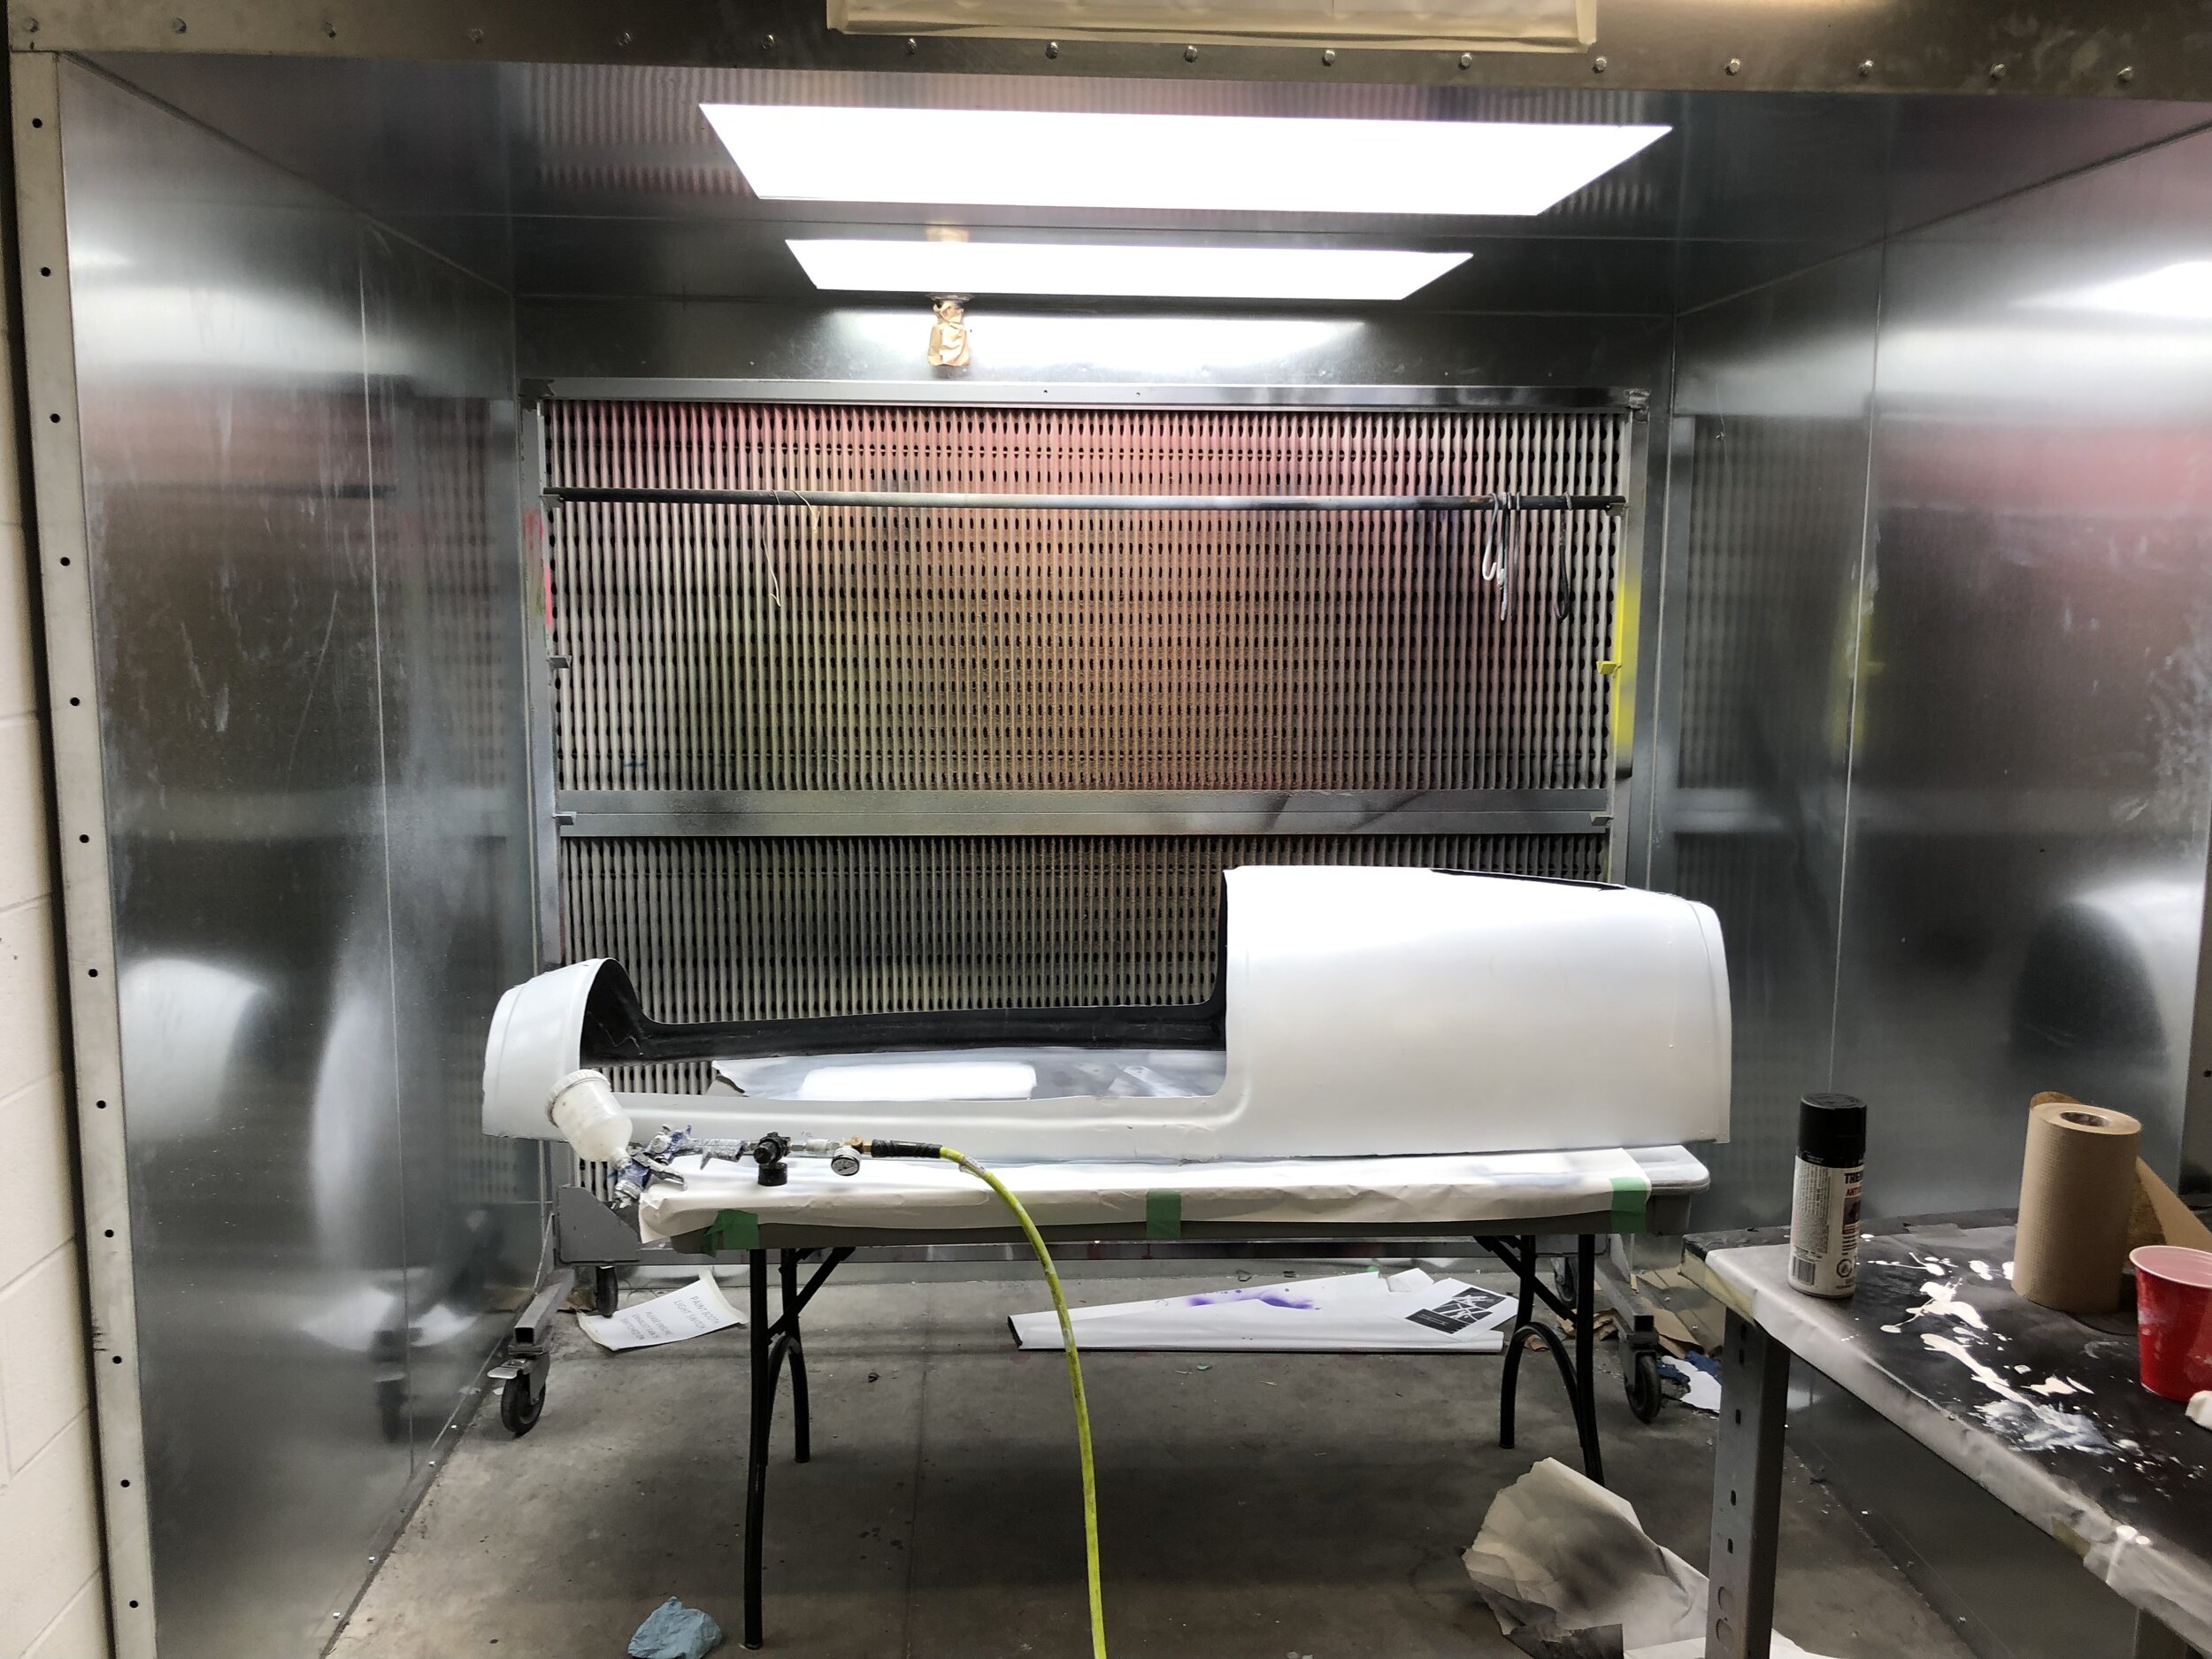
Fuselage going through paint.
For the first time we also incorporated a metal frame in Claire: this would facilitate mounting things onto the submarine. Rather than mounting multiple components through the hull using various techniques (mostly adhesives) that failed multiple times in competition, we would only have to worry about ensuring a solid joint between the hull and the frame, and everything else could then be easily mounted to the frame which had plenty of flat surfaces and lend itself to using fasteners and other non-permanent joints. The frame was a complicated assembly comforted of formed sheet metal, formed tubes, extrusions, plates, and a bunch of welding. Luckily we got the fabrication of this out-sourced and sponsored, with only a handful of modifications needed to be done in-house.
The team was also able to get its hands on a desktop CNC machine from a sponsor, which I was happy to get to play with. We used this to mill hinges, and also the enclosures for the new electronic controls system, which required plenty of gasket and gland holding features for water-proofing.

Claire’s metal frame.

Desktop router.
CNC’d and formed hingers.
The team drove from Waterloo to Maryland for the International Submarine Races the summer of 2019, hosted in the Naval Surface Warfare Center, Carderock Division (one of the coolest parts of going to competition is seeing the huge R&D facilities inside the navy’s base). That yearI did not go to competition but I heard all kinds of crazy stories.
Just like that, after 5 wild years, my role in the team came to an end. Claire was my far the best submarine I ever designed, and left incredibly proud of what the team had accomplished in only 5 years. Most importantly, I left incredibly excited to see what the team’s next generation would accomplish. In a recent interview, the new WatSub lead talked about the upcoming 4th generation submarine: Darwin.
I finish this post with a picture of Claire in the shape it came from competition, and a picture of the insides of Claire as seen by the pilot. Hopefully you can imagine how it felt to travel the world with our racing submarine. These 5 years were not only a great start for my engineering career, but also the most fun I’ve ever had.

Claire back from competition, with battle scars.
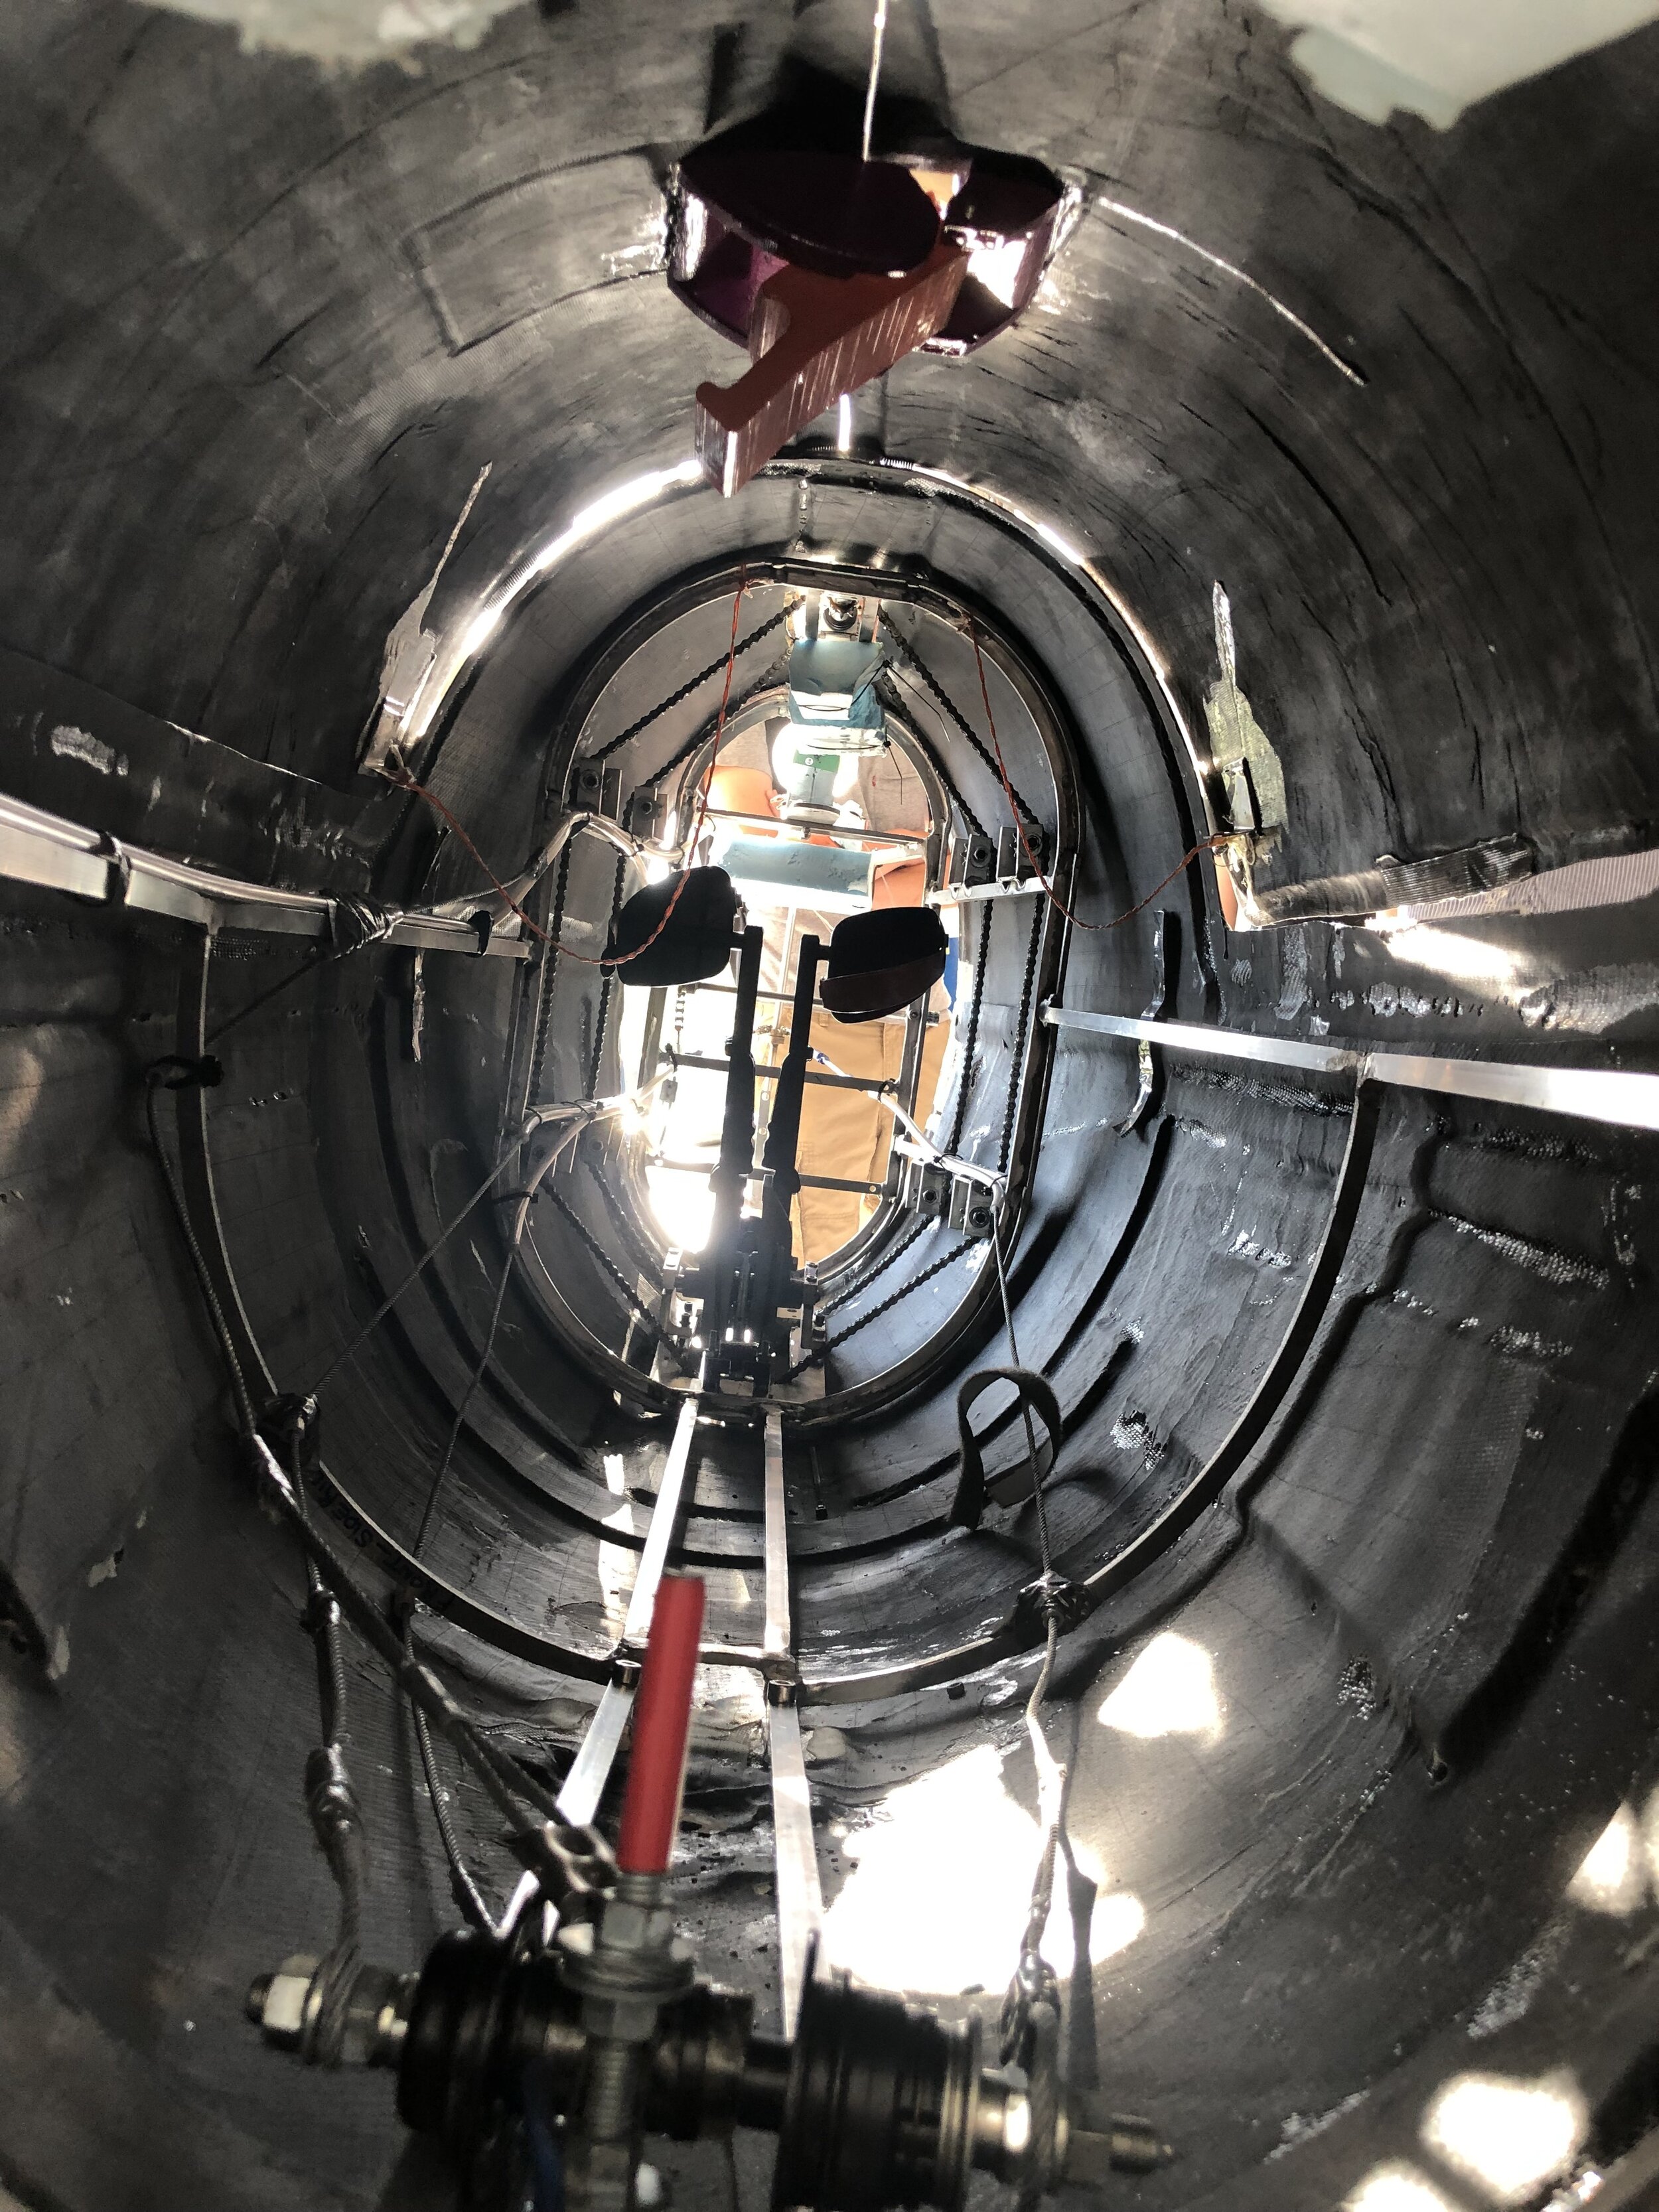
The inside of Claire, as seen by the pilot.